Man Cave Modeler

Product Reviews
Take it or leave it, the comments here are strictly my opinion,
(and you know what they say about opinions)
I do this for fun and receive no compensation from anyone I might mention on this site.
Just my 2 cents worth


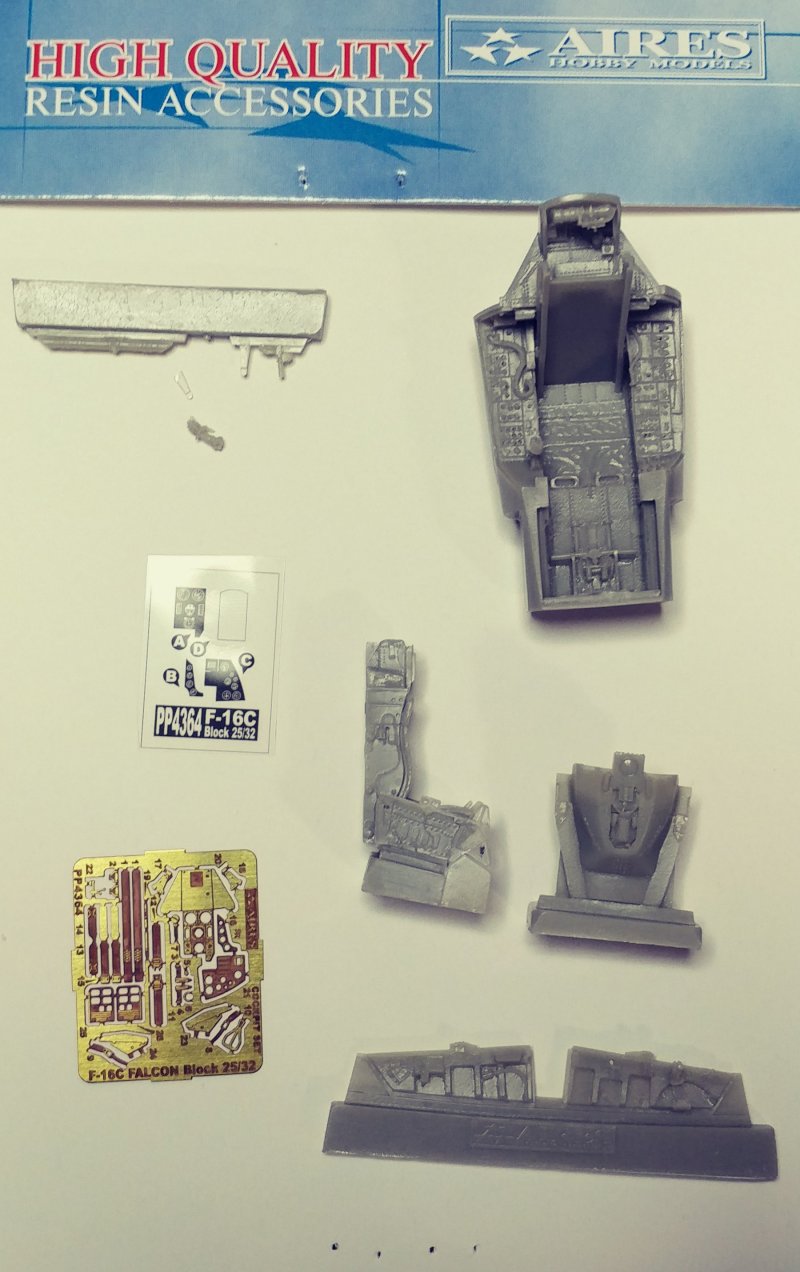
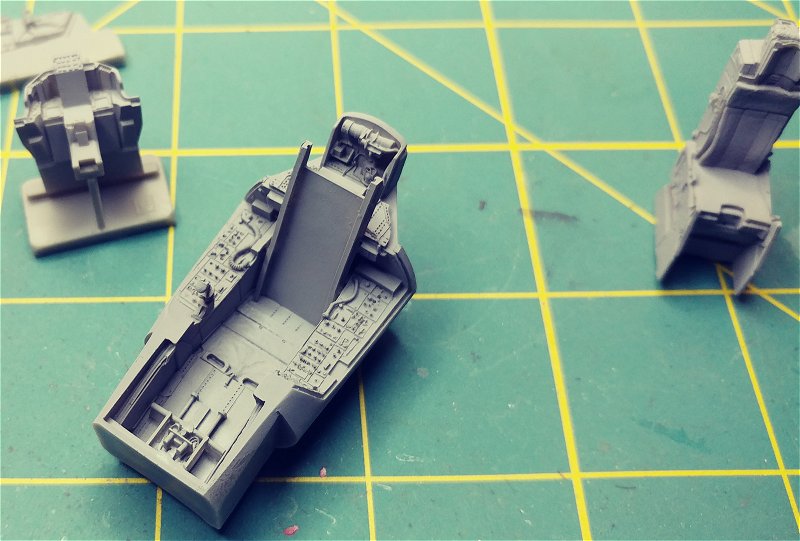
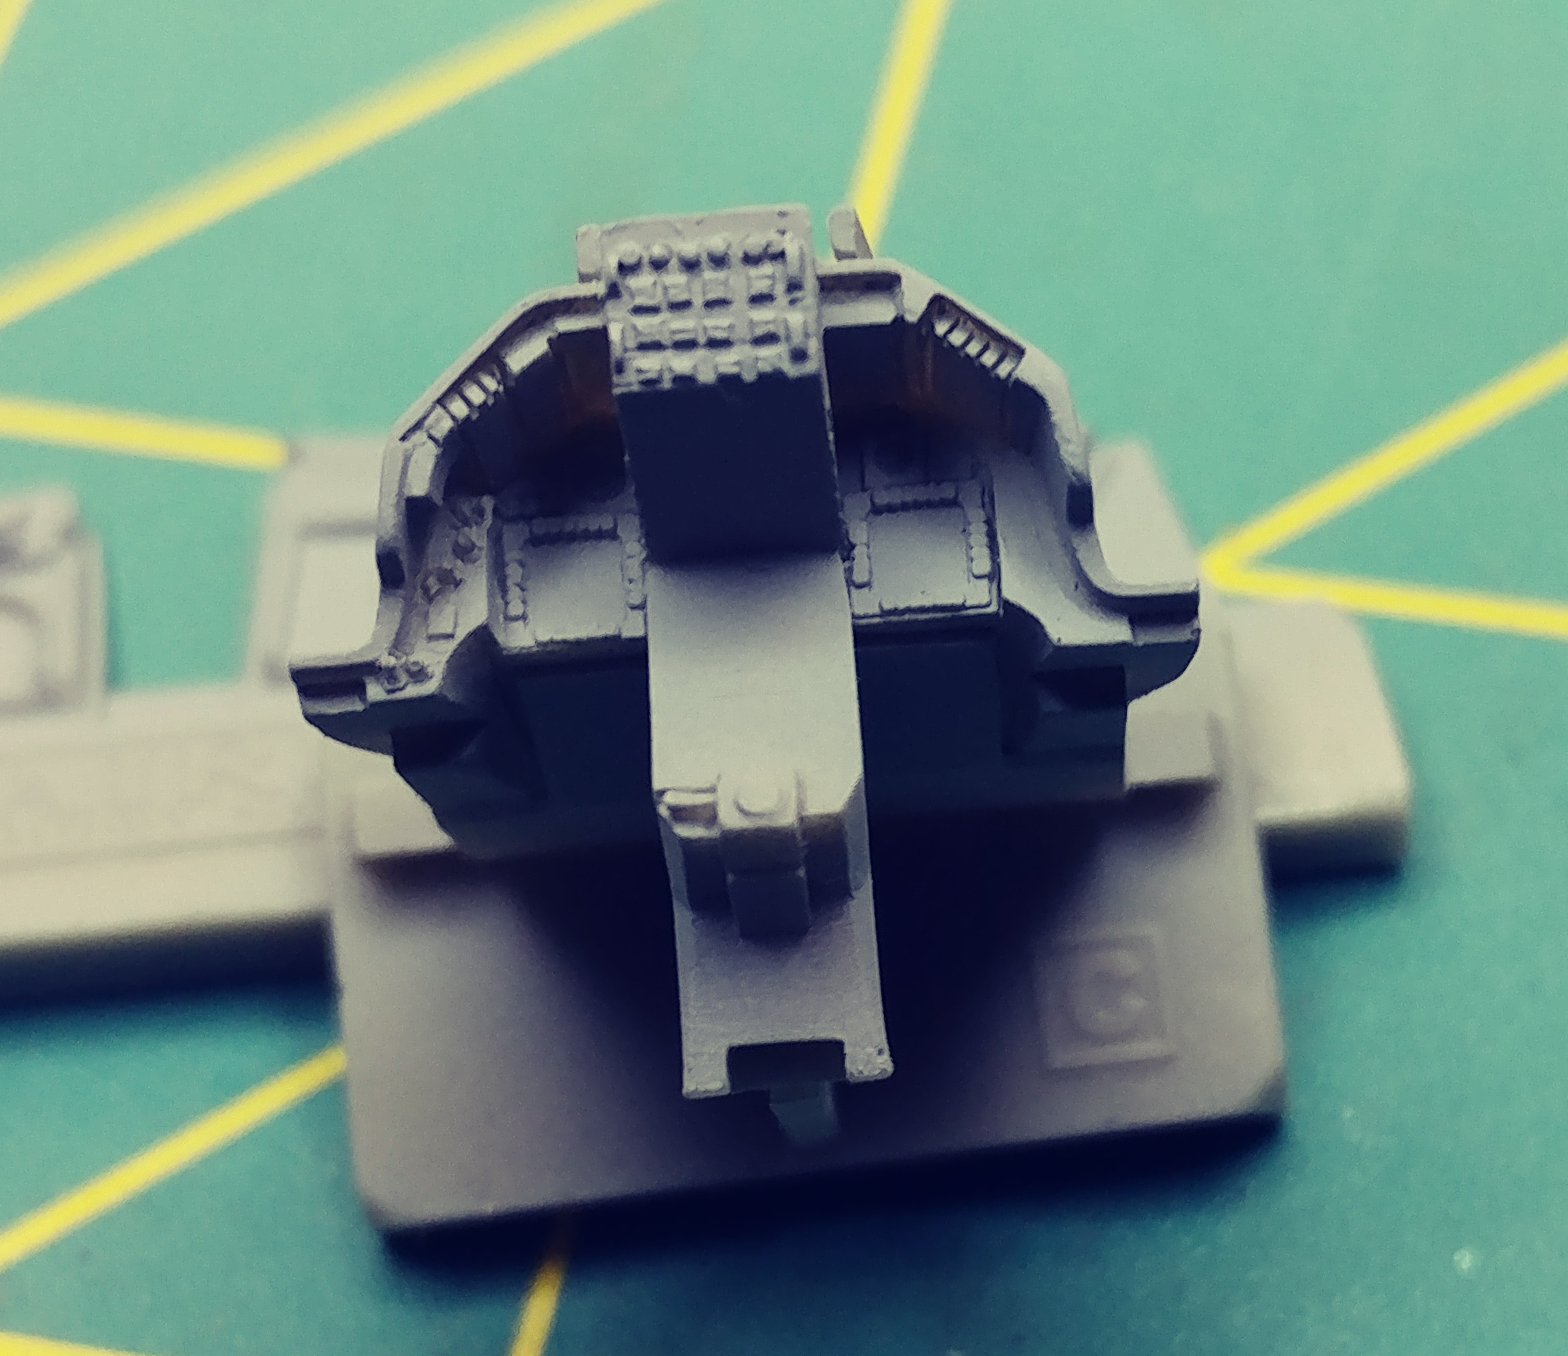
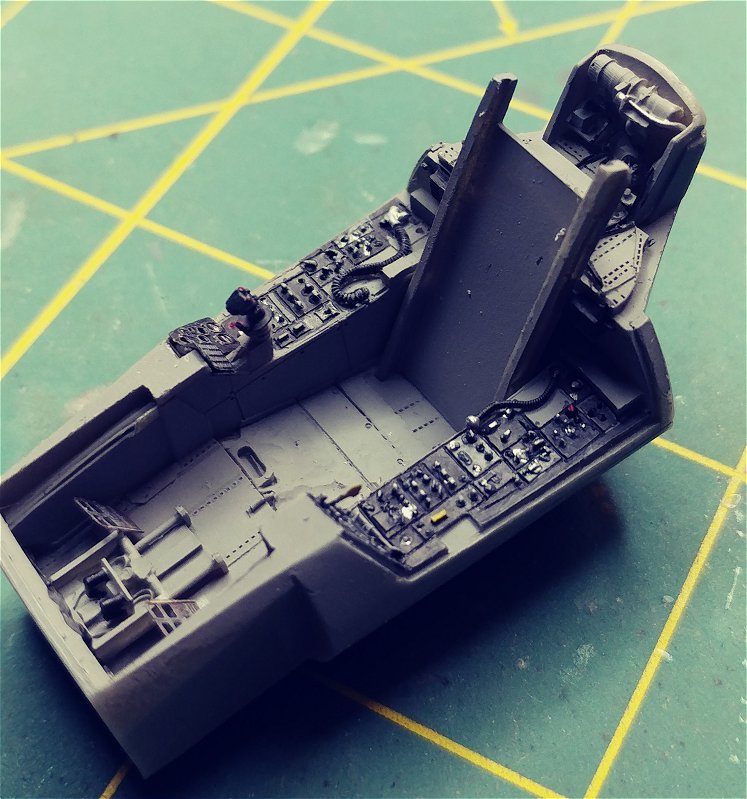
Aries 4364 F-16C Falcon Block 25/32 Cockpit Set
To fit Tamiya kit

This kit comes with 1 sheets of photo etched brass, an acetate sheet with the HUD glass and gauge dials and 5 piece of resin.
The small brass sheet contains a couple of Control Panel bezels, the seat belts and some other smaller parts like ejection seat handles
All the parts are well defined and extremely well detailed. The tub has a large block of resin left over from the casting process that will need to be removed and some sanding to fit inside the fuselage properly. Dials and gauges are cut from acetate under brass bezels with the many switches, knobs and dials molded on. The biggest difference between kit and cast is the detail behind the pilot's seat. The back of the seat contains many details of the ejector mechanism not found in the kit part
The instrument panel is where this set lets me down. The buttons on top and around the two displays of the aren't as crisp as other parts of the kit. I think using photo etch frames with acetate screens would enhance this part of the kit greatly.


Tips & Notes
The instructions with my set notes you need to remove the Cockpit Hood from the kit. This was not present on the Tamiya 16-C (61101) but will need to remove the area behind the pilot seat
This sets requires an enormous amount of sanding, trimming and test fitting, of both the resin and the plastic parts.
I made the mistake of removing parts of the molding on the seat too soon and managed to break off the "V" shaped frames on the front. Easy enough to re-attach.
Instruction sheet


Aries 4370 F-16C Falcon Wheel Bays

This kit comes with 2 pieces of Resin and 3 small lengths of copper wire. As with the Cockpit Set, these parts are well detailed. It also requires some trimming and sanding to fit, but nowhere near as much as the Cockpit. The upper half of the air intake from the kit mates perfectly to the resin lower part as does the intake fan once the alignment pin is removed

The nose wheel bay on the other hand required quite a bit on sanding, on both the resin and the plastic. almost to the point where I was getting concerned about the amount of material I was removing, but it all worked out


Tips & Notes:
The kit's main gear wheel bay contains mount and alignment brackets, the Resin does not, so care must be taken in order to keep the aircraft from tilting off to one side. I would dry fit the kit's landing gear into the slot in the resin, and the kit part # taped on to to the fuselage to ensure proper alignment of the main gear bay. I made the mistake of installing this a very small bit too far aft and had to shave a few microns off the main gear mounting pad.


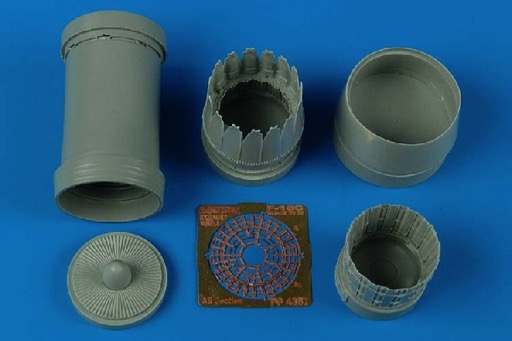
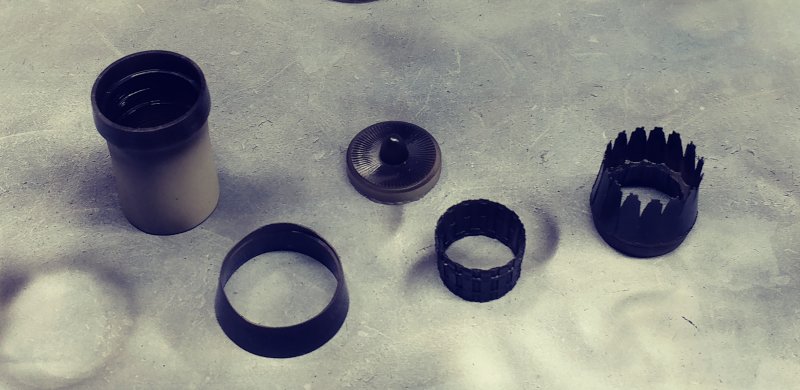
Aries 4387 F-16C Falcon Block 25/32 Exhaust
5 pieces of resin and a photo etch sheet, pretty basic
It goes together with a minimal amount of trimming but is a definite enhancement to the kit.


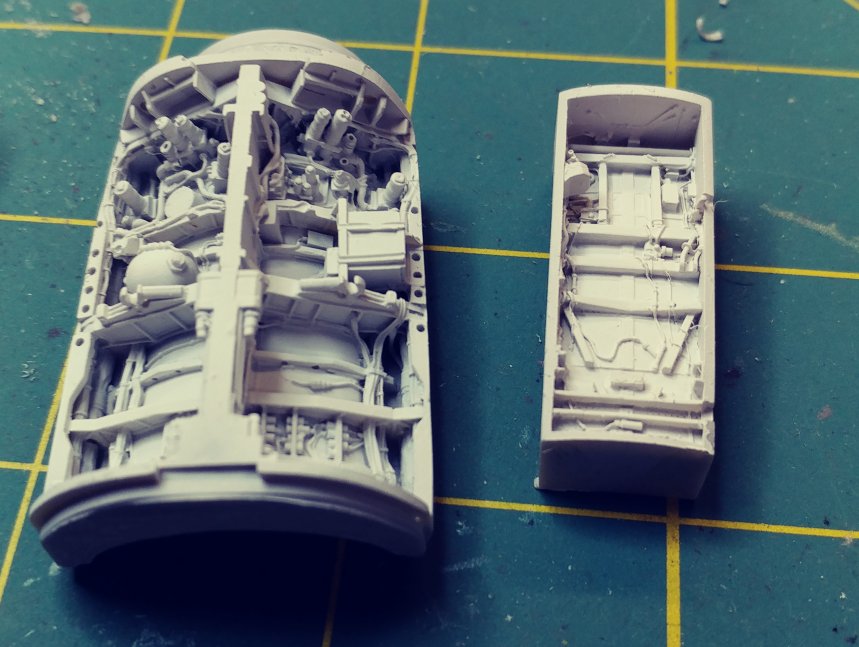
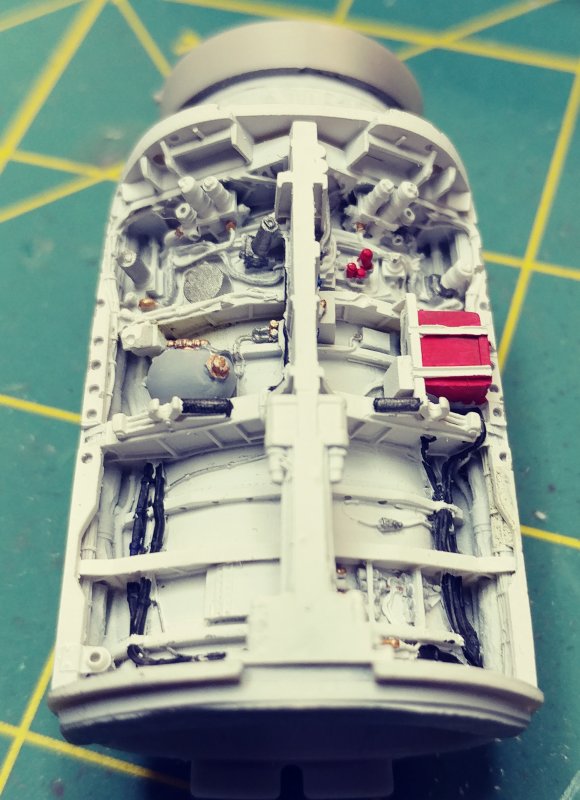
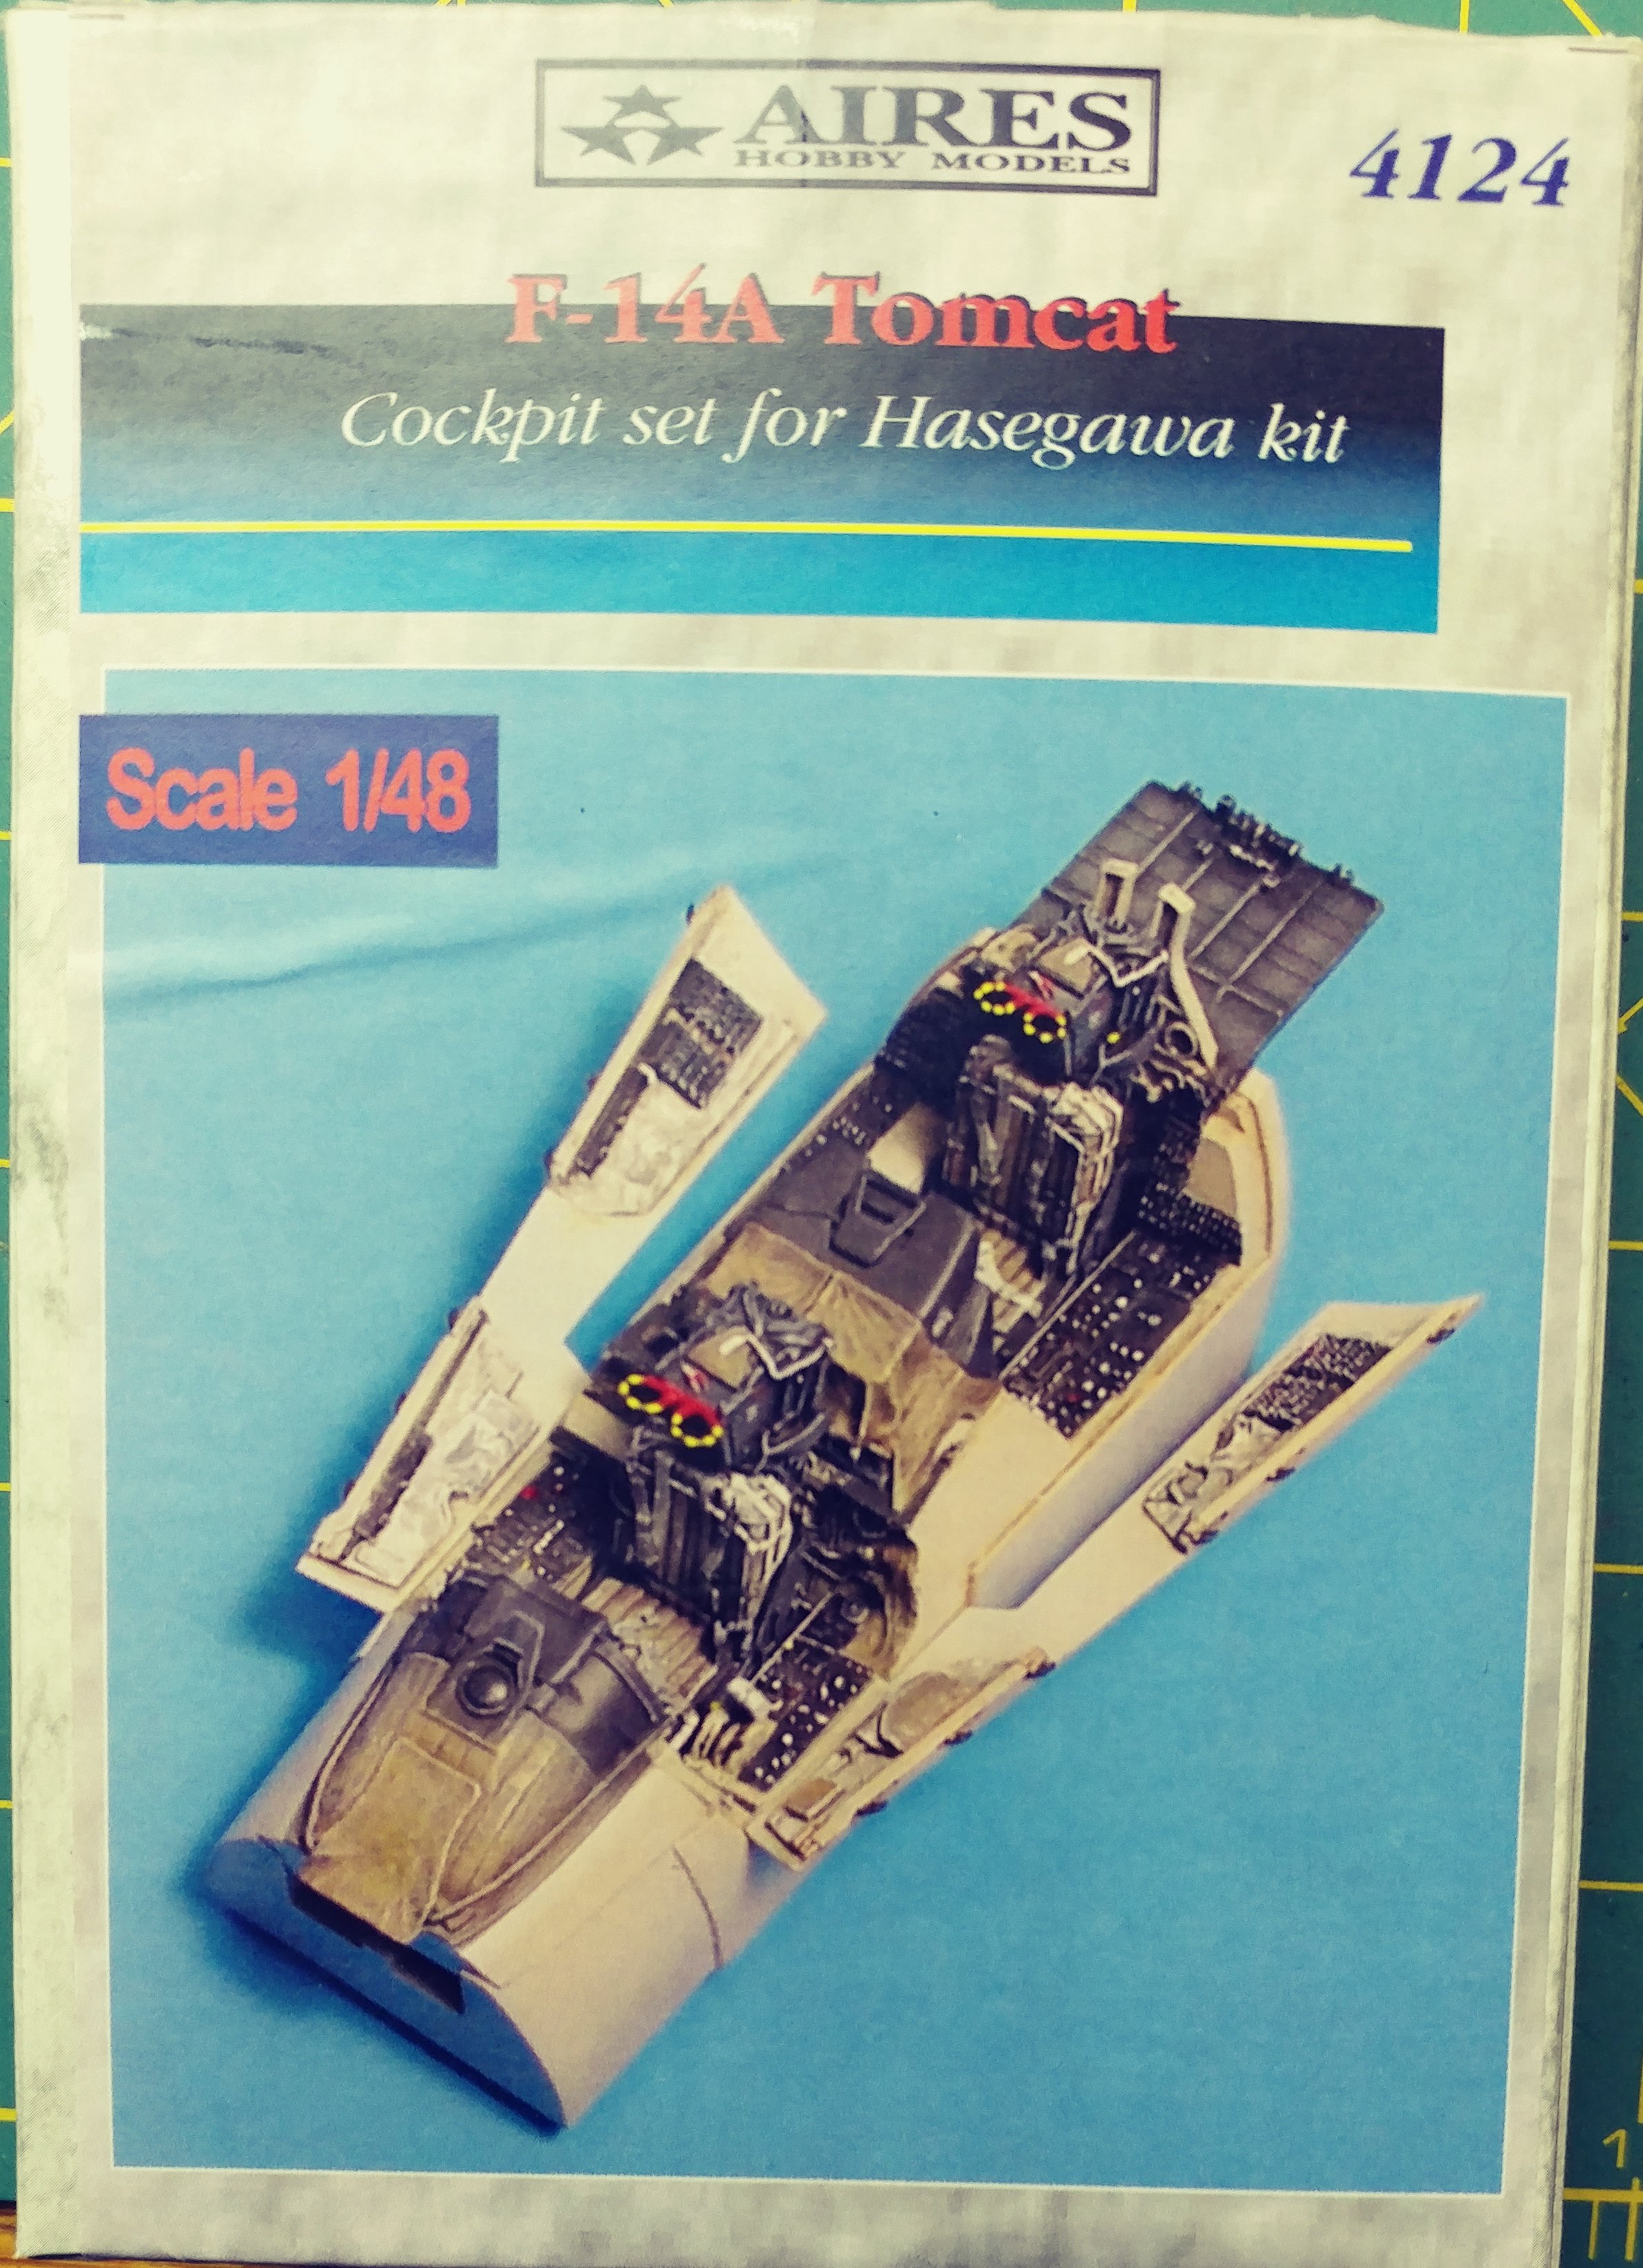
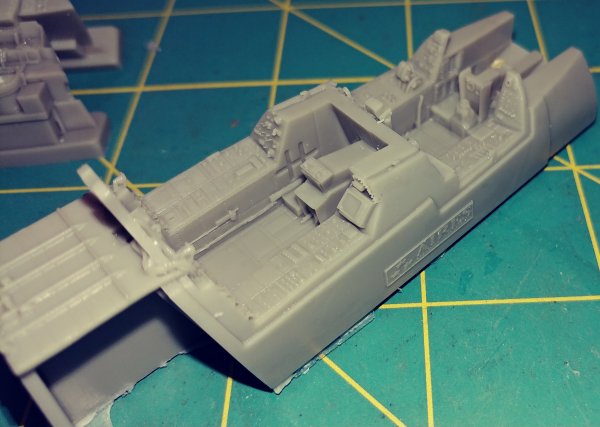
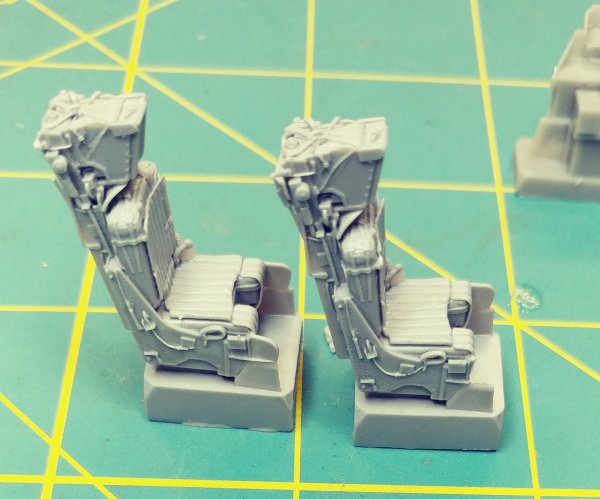
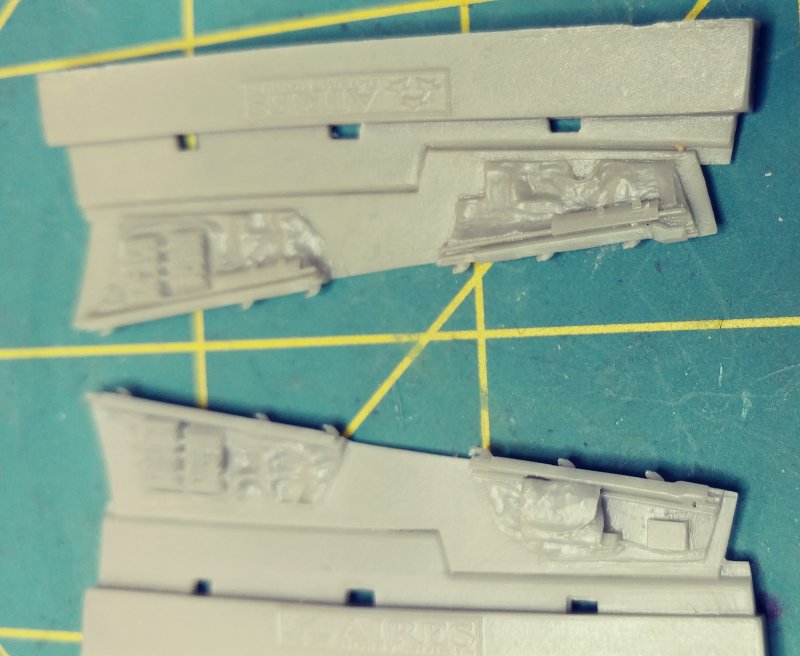
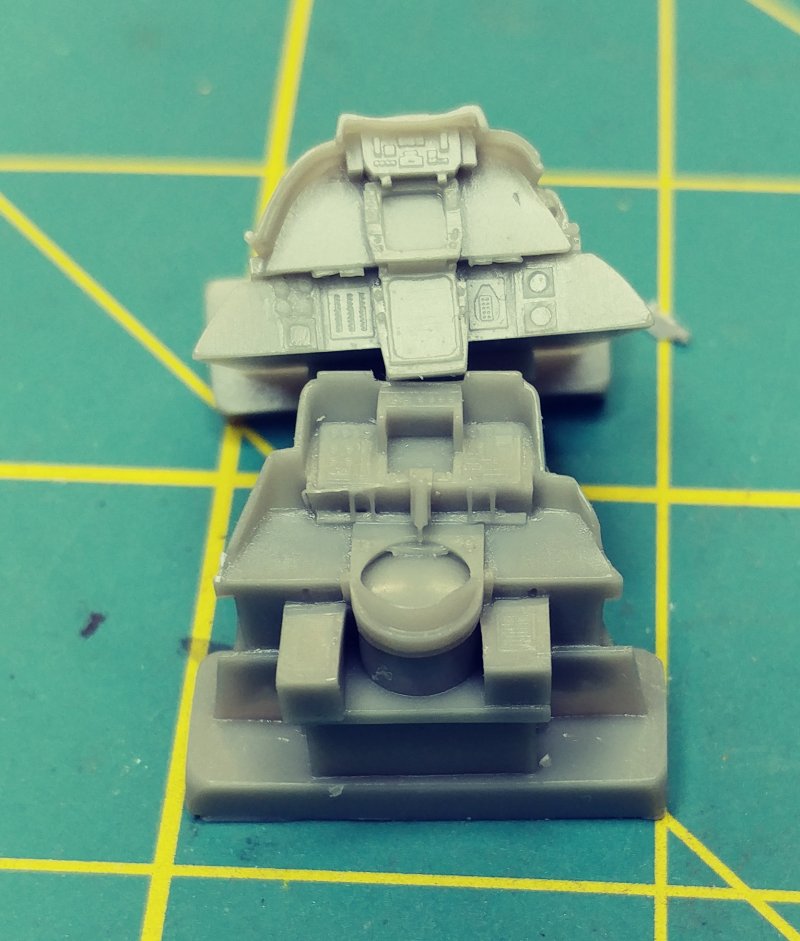
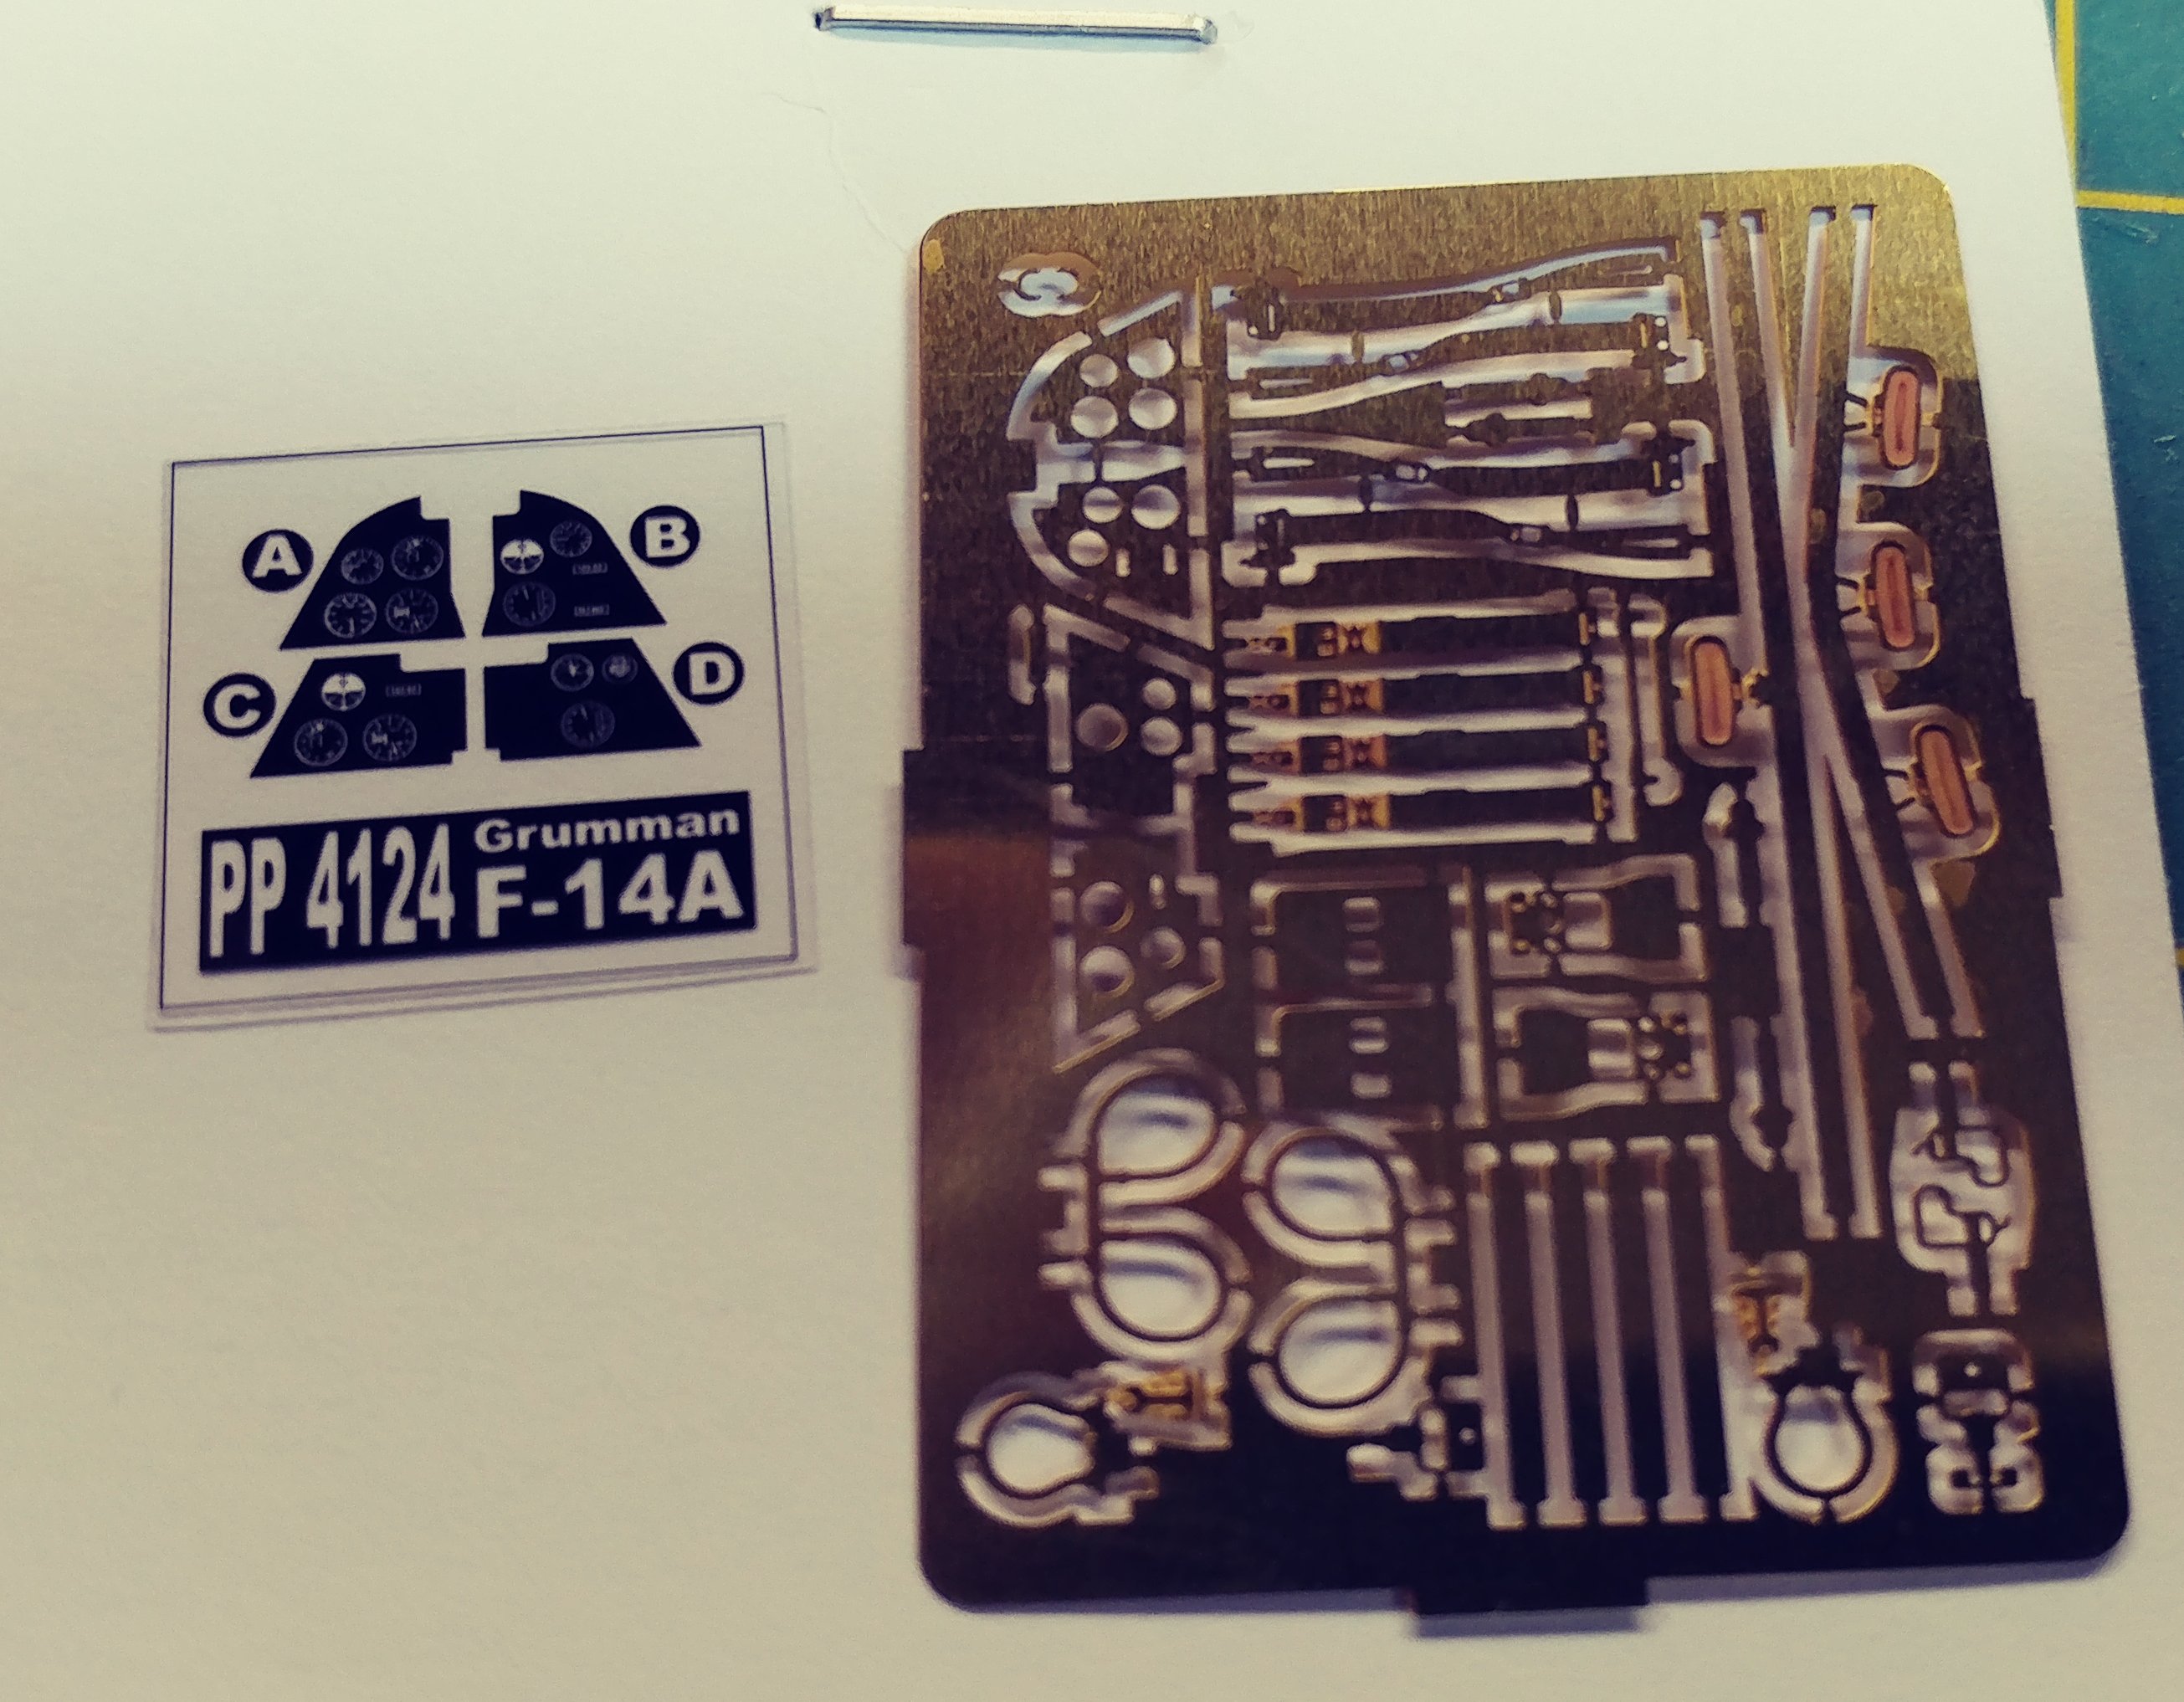
Aries 4124 F-14 Tomcat Cockpit Kit
To fit Hasegawa kit

This kit comes with 1 sheet of photo etched brass, an acetate sheet and 8 piece of resin, molded in two different shades of gray,
Which makes it easier (at least for me) to see the details on the parts.
One or the seats had a small piece broken off but not a big deal, It's a on the base of the seat and I can either re-attach or ignore since it's pretty well hidden in the cockpit


Tips & Notes:
None yet. I haven't used it yet.


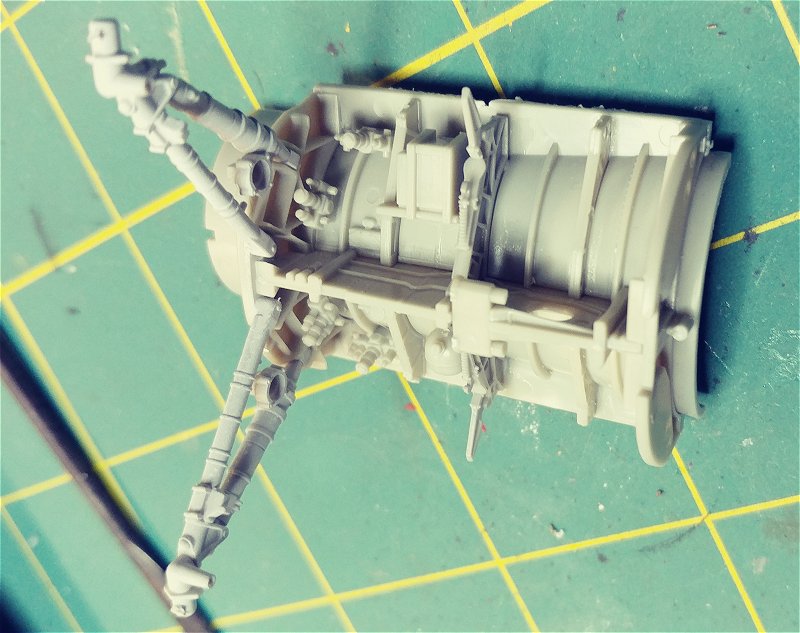
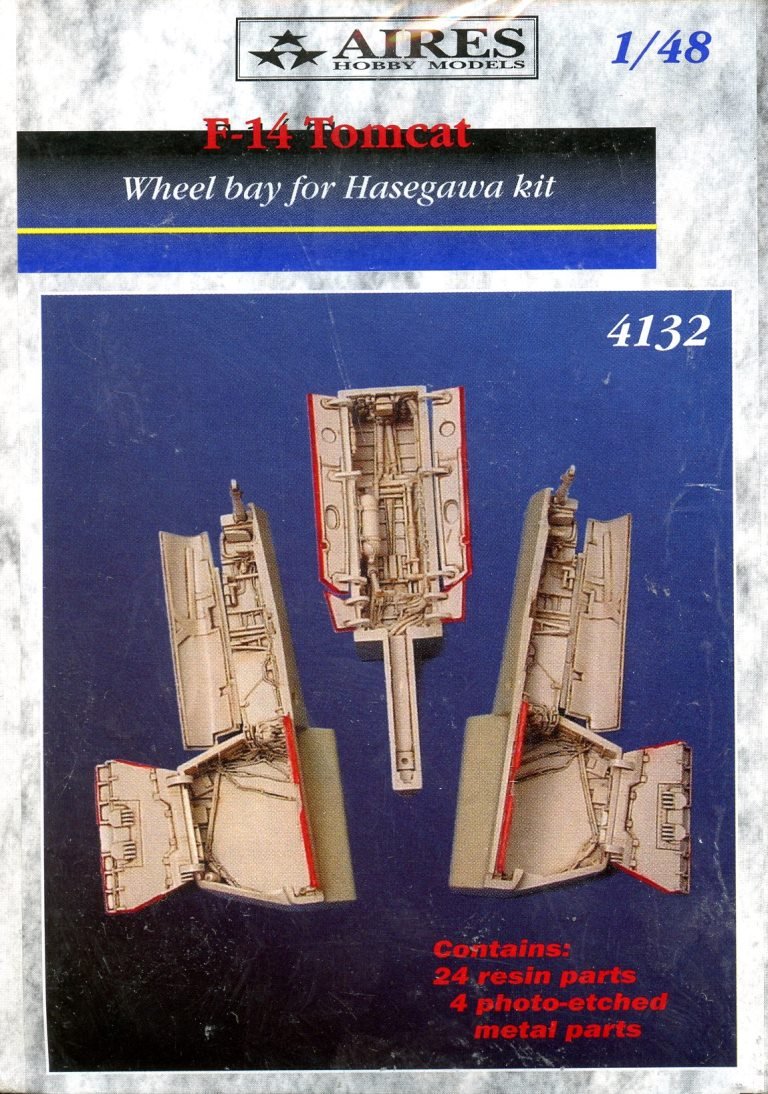
Aries 4132 F-14A/D Tomcat Wheel Bay
To fit Hasegawa kits

This kit comes with 1 sheet of photo etched brass, an acetate sheet and piece of resin, molded in gray


Tips & Notes:
None yet. I haven't used it yet.


More to come some day


Home Page
More Reviews
Send a message

Last Updated March 15, 2018