 |
||
 |
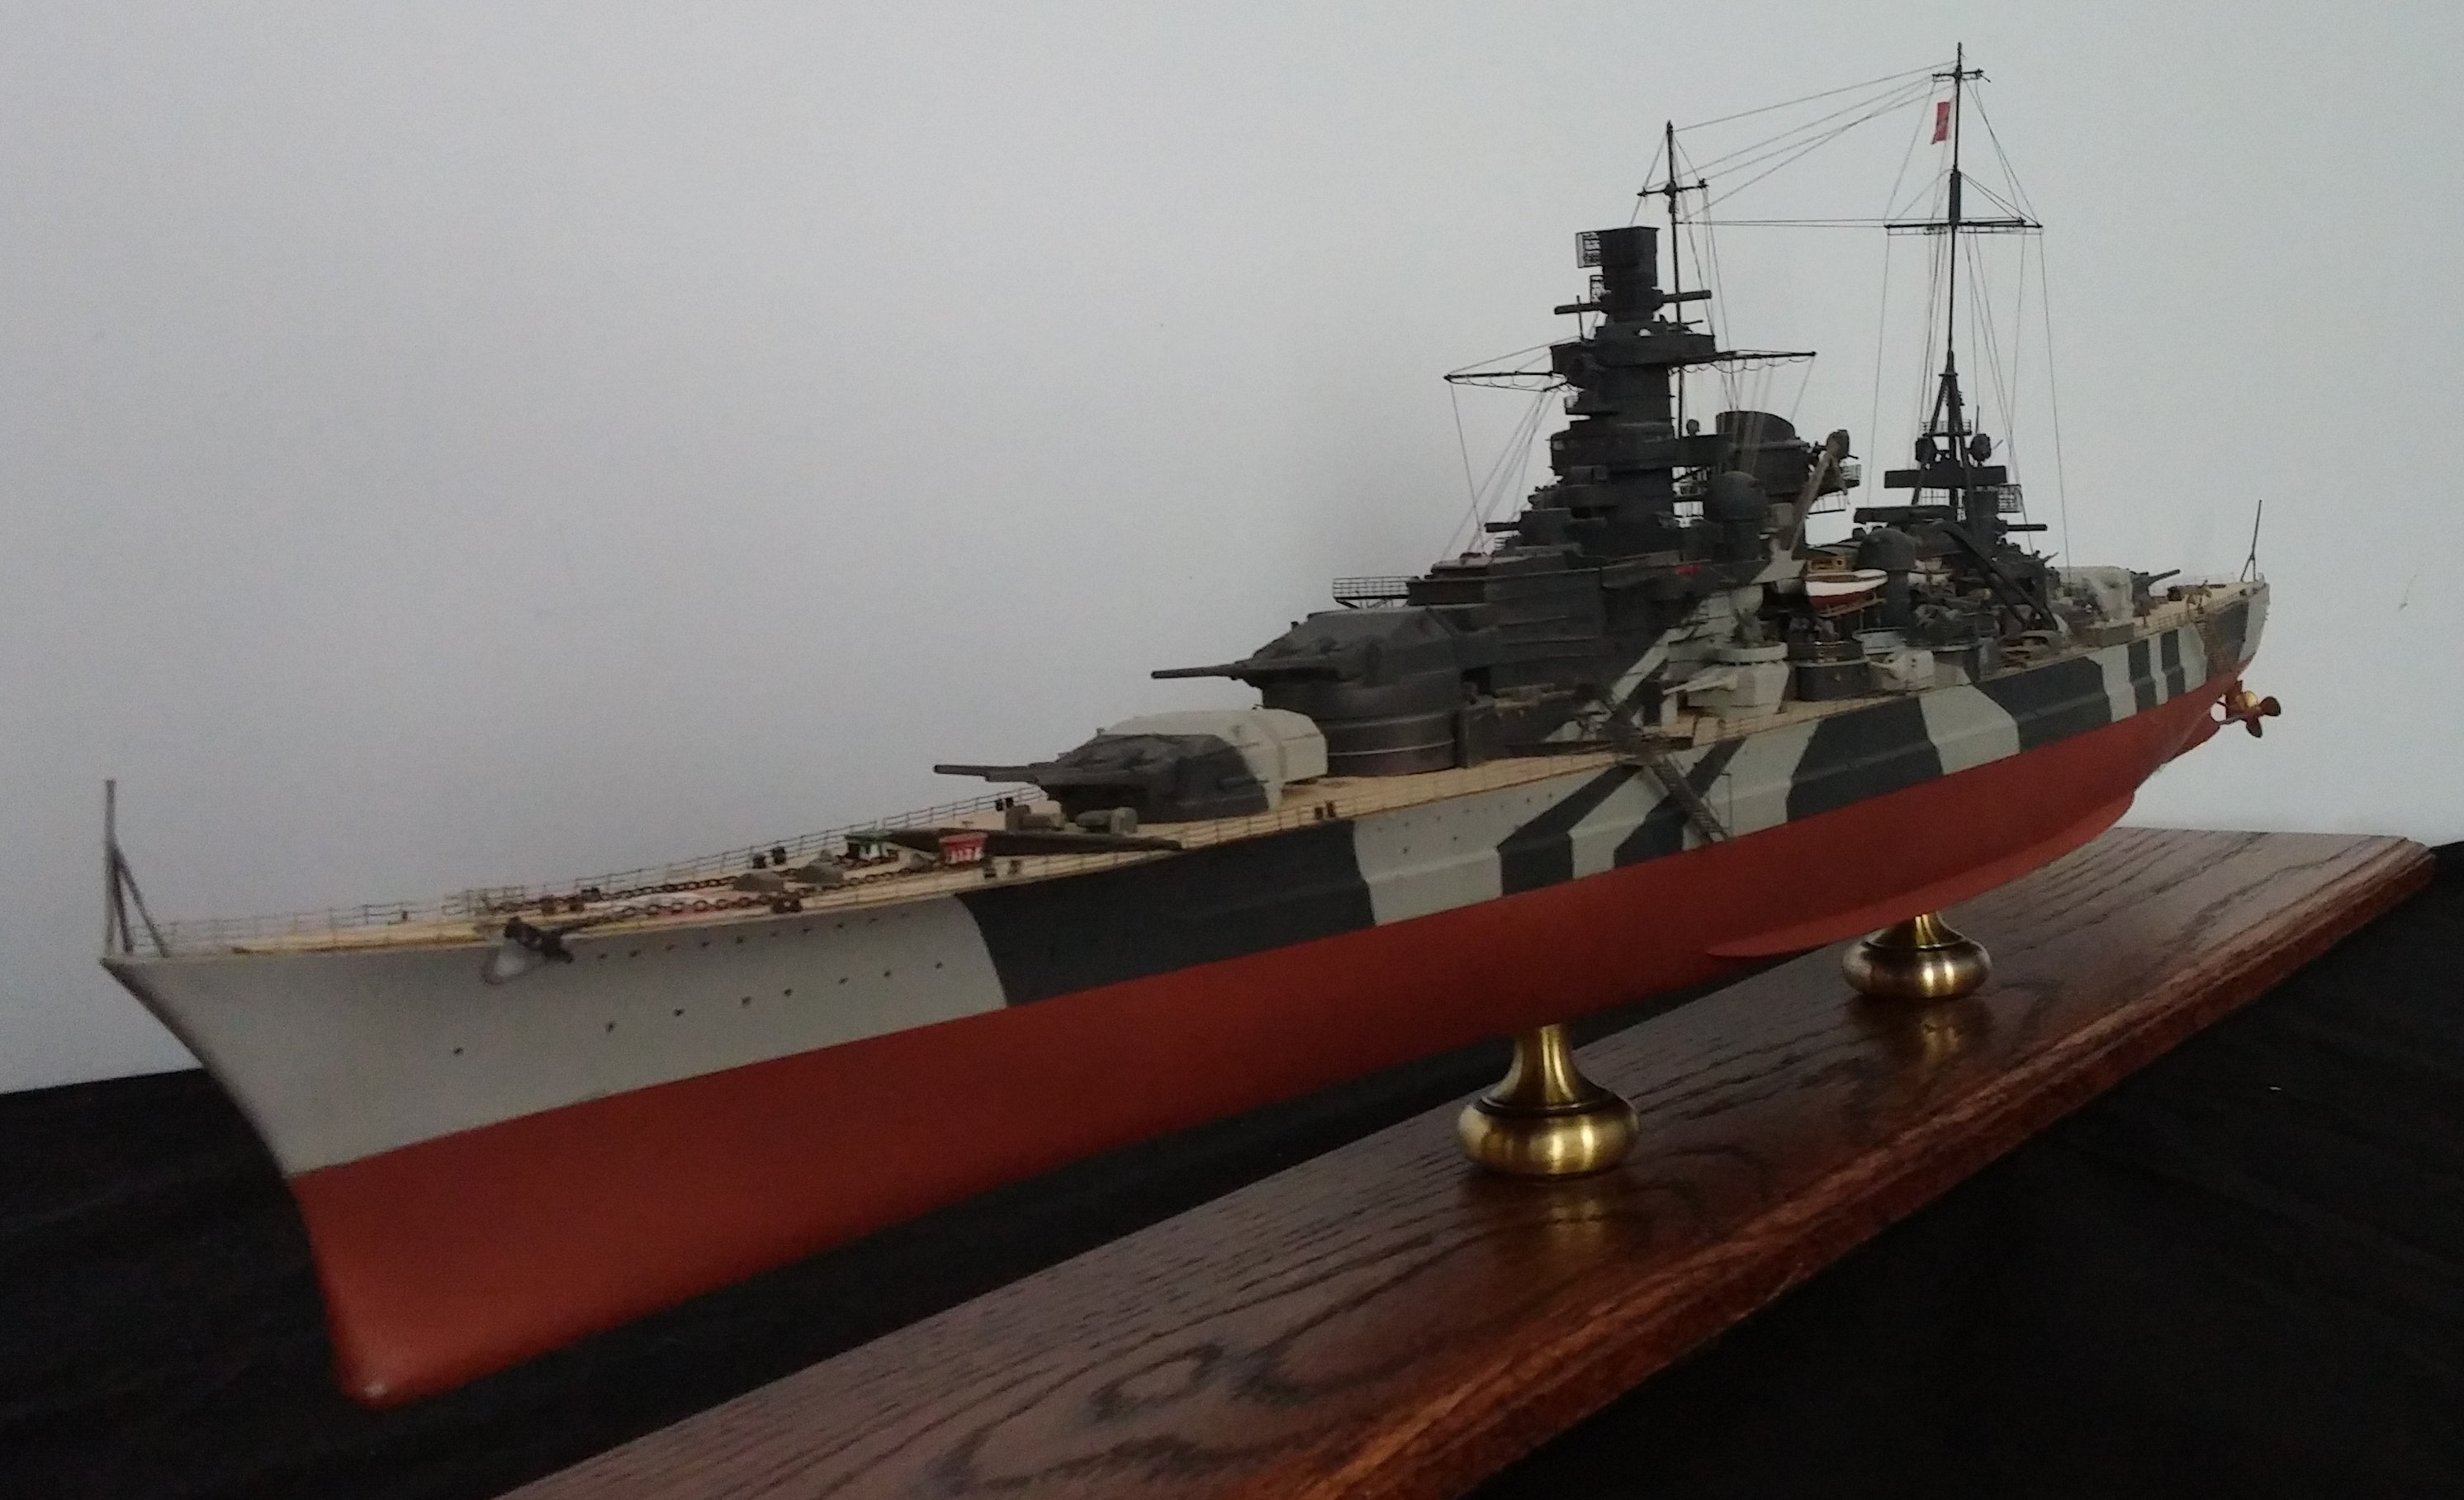
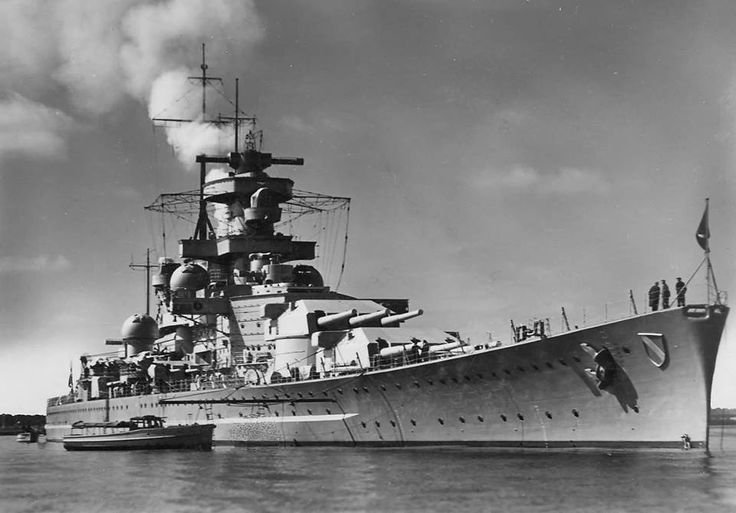
Schlachtkreuzer Scharnhorst | |
| The Ship
A Brief History |
||||||||||||||||||||||||||||||||||||||||
|
| |||||||||||||||||||||||||||||||||||||||
|
Operation Berlin
Originally scheduled for December 1940, Scharnhorst and Gneisenau finally sailed on January 22. In order to avoid a large British surface force sent to intercept him, Admiral Lütjens took his flotilla through the Denmark Strait into the Atlantic shipping lanes. The attack on first convoy sighted was aborted due to the presence of the HMS Ramilles. They two ships finally located a west bound convoy and manages to sink 5 Merchant ships. After heading south towards the Azores, the ships spotted another convoy but the attack was again aborted due to the presence of the HMS Malaya. Adm. Lutjens then took his ships back to the western Atlantic where he sank a lone freighter. The ships then located two convoys and sank or captured 16 Merchant ships. At the appearance of the HMS Rodney the two ships headed away from the convoys and were ordered to Brest where they arrived on March 22nd. Operation Cerberus
After almost a year in Brest, and under frequent air attack from the British, the Scharnhorst along with Gneisenau and the heavy cruise Prinz Eugen, which had arrived June 1, 1941 were ordered to return to Germany.
Deployment to Norway Operation Sizilien
Scharnhorst along with Tirpitz and nine destroyers left Altafjord on September 6th bound for Spitzbergen In September 1943 a task force was assembled, comprising the battleships Tirpitz, Scharnhorst and nine destroyers. On September 8th a battalion of German troops was landed, and supported by naval gunfire, seized facilities and forced Norwegian garrison to withdraw. After destroying the coal depots and other facilities, the German forces withdrew and the ships returned to Altafjord and anchors in Langfjord. Operation Ostfront
On Christmas day 1943 Scharnhorst and the 4th Destroyers Flotilla were ordered to attack Convoy JW55. The British Admiralty, alerted by Norwegian resistance set out a trap for the elusive battleship. On the 26th, Admiral Bey, in command of the German forces detached his Destroyers to scout to the south. Shortly after 9:00 AM, the Scharnhorst encountered a pair of cruiser and was struck twice. One shell destroyed the radar controls and leaving Scharnhorst virtually blind in with visibility rapidly deteriorating. Bey then turned south in an attempt to distance himself from the pursuers. Once he had shaken them he attempted to circle around them to attack the convoy again. Once again he ran into the British cruisers and after a brief encounter in which hits on the HMS Norfolk disabled her radar and a turret, Bey decided to return to port with The British cruisers in pursuit. HMS Duke of York along with four escorting destroyers picked up Scharnhost ar 4.15 P.M. Half an hour later, As Duke of York closed, HMS Belfast illuminated Scharnhorst with star shells. Duke of York's first salvo caught the ship unprepared and disabled the two forward turrets. Three hours later, after a barrage of torpedo and gun hits, the Scharnhorst capsized and sank with a loss of over 1,900 men
A full career timeline can be found at www.kbismarck.com
|
 |
Building the Scharnhorst | |
| 1/350th Scale, Dragon Models | ||||||||||||||||||||||||||||||||||||||||||||||||||||||||||||
| Keel Laid November 6, 2013 | ||||||||||||||||||||||||||||||||||||||||||||||||||||||||||||
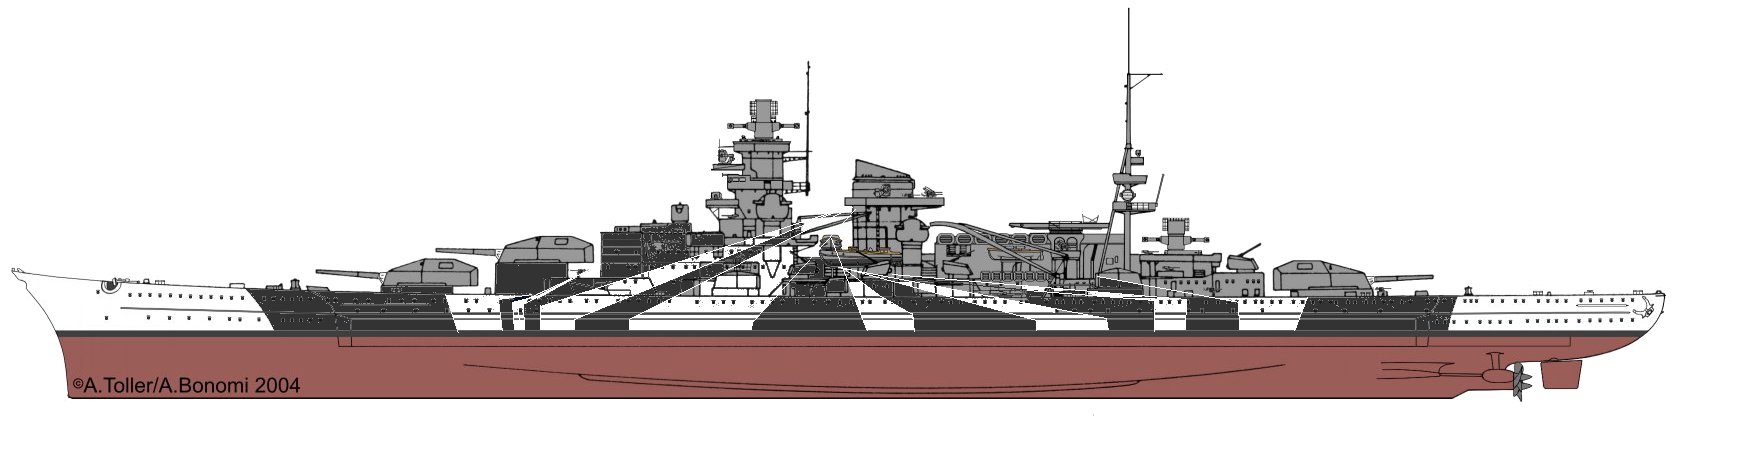
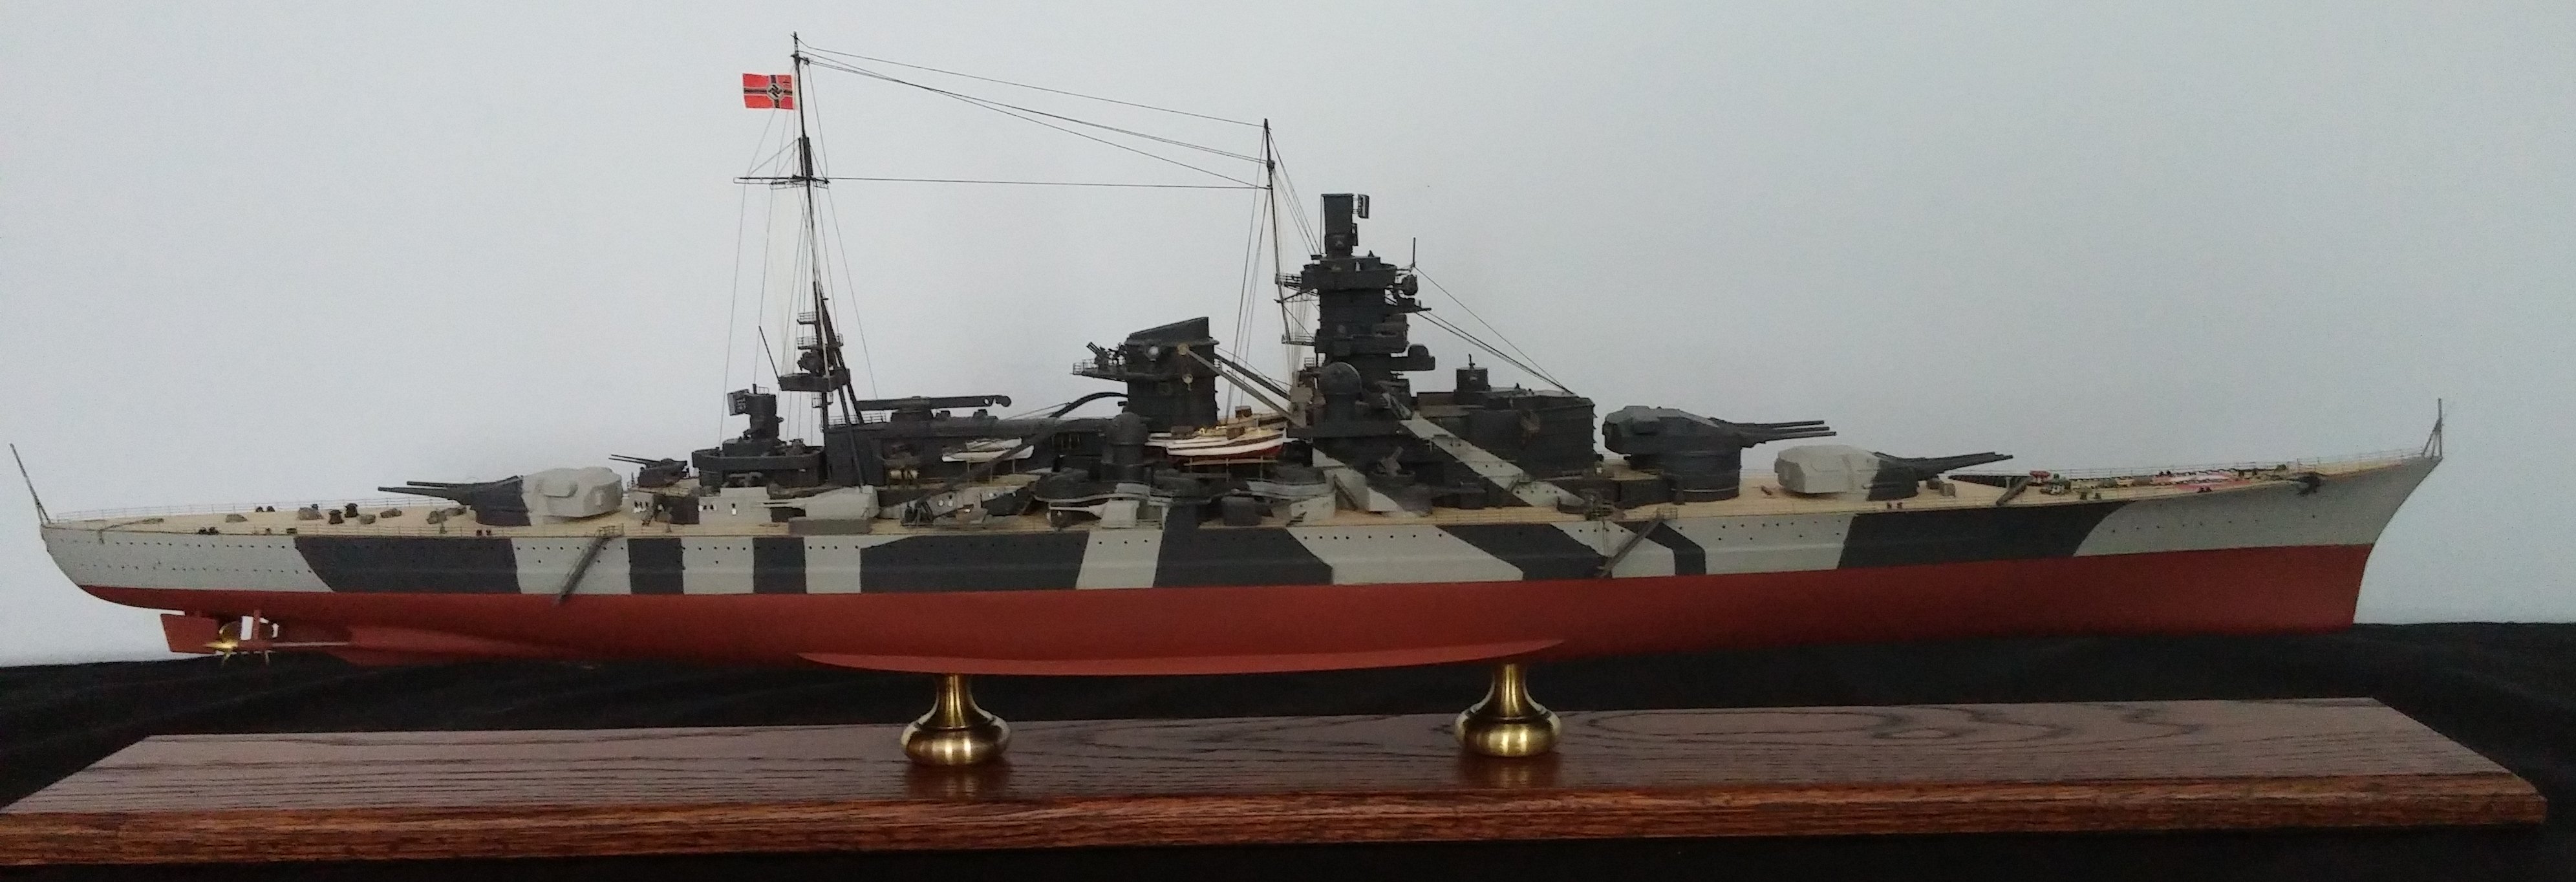
| As I was doing research into the ship and trying to decide which color scheme to use, I came across an obscure photo of the ship that showed a splinter paint scheme similar to the one used on Tirpitz during Operation Sizilien.
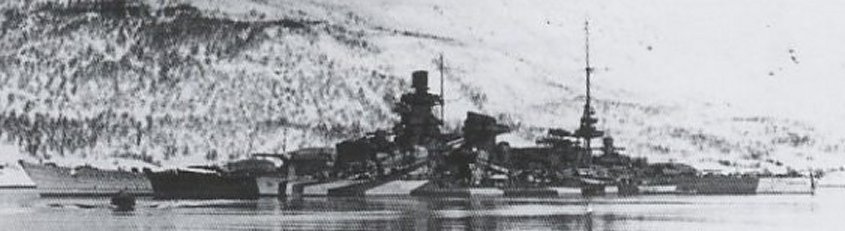
I found it a little difficult to pick out the details as to location of the pattern so I modified one of Toller/Bonomi's oustanding drawing off the kbismark.org website to assist in the painting
|
||||||||||||||||||||||||||||||||||||||||||||||||||||||||||||
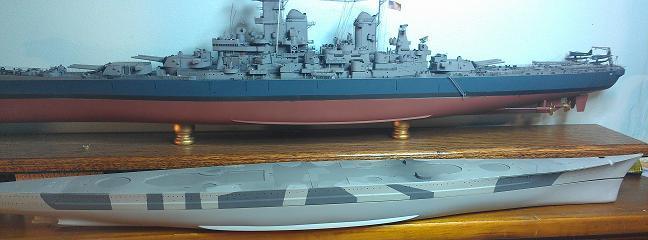
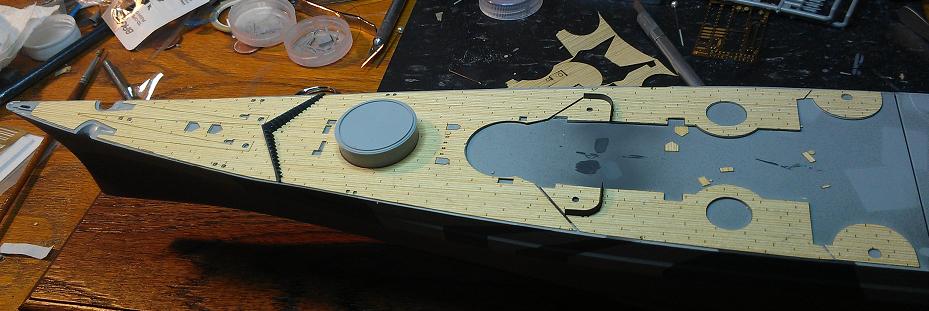
340 windows to drill out then the base coat of floquil SP lettering grey. I'm using Floquil Lark Dark Gray for the darker color. I've painted the hull and now I'm kicking myself for being lazy and not doing a color test first. It's a little on the light side so the options are re-mask and repaint, or Mask of the bow and stern and use the sizilein scheme. I went with the remask and have painted the ship in the charcoal gray.
|
||||||||||||||||||||||||||||||||||||||||||||||||||||||||||||
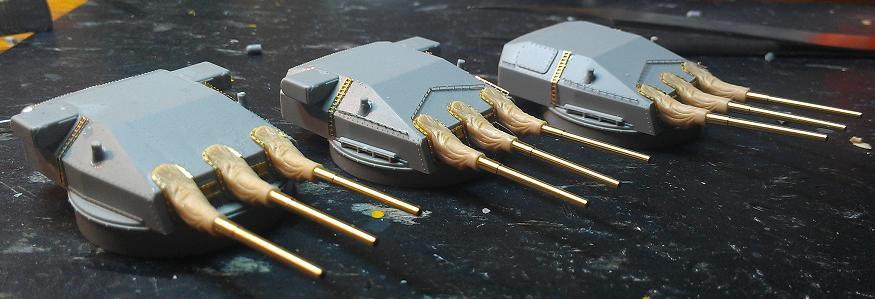
Looking at all the subassemblies, I've decided that rather than have dozens of small assemblies laying around and possible getting lost, I'll build them as I need them. |
||||||||||||||||||||||||||||||||||||||||||||||||||||||||||||
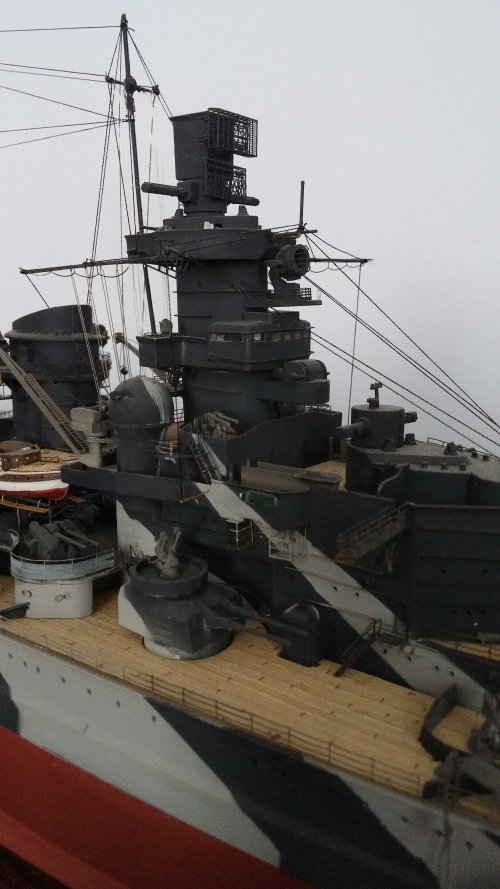
Forward Superstructure, Conning Tower & Range Finder |
||||||||||||||||||||||||||||||||||||||||||||||||||||||||||||
| 11/12/2013
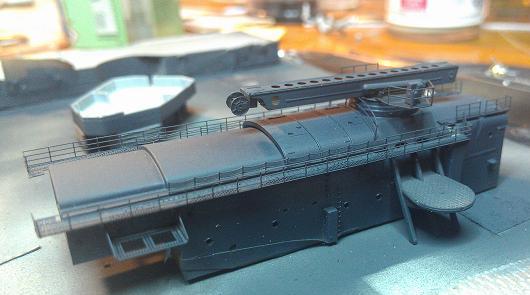
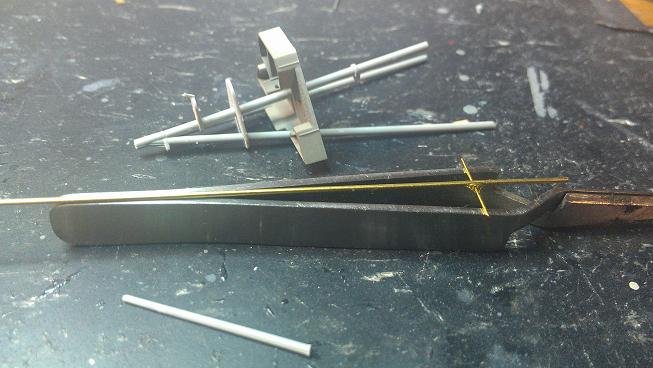
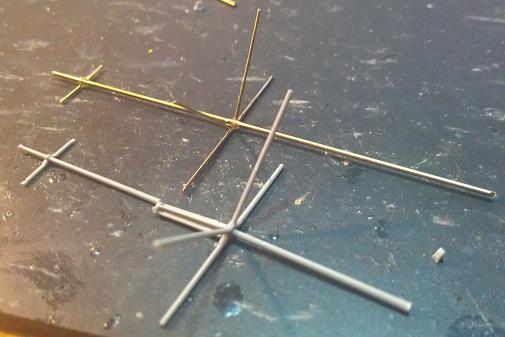
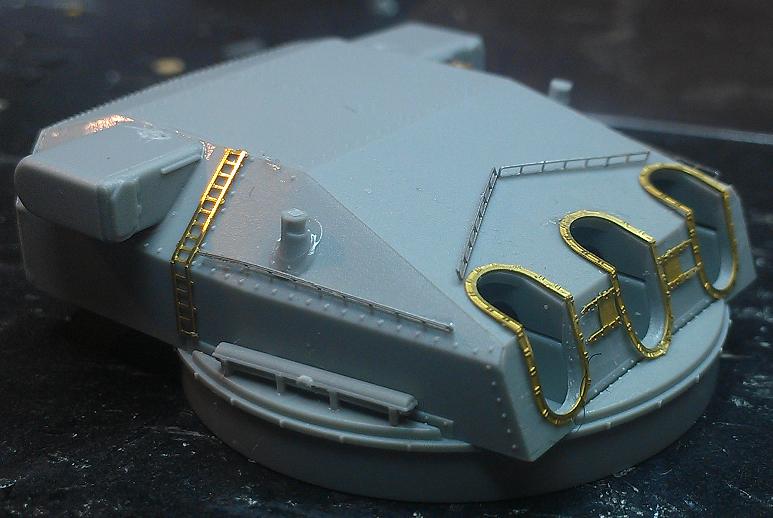
Range finder and radars completed. I replaced the plastic yardarms with .020 Brass rod but it seems a little soft and flexable for tying off the rigging so I might pull them and replace them with Stainless Steel. In my impatience to try out these wooden decks and against my better judgement, I've painted an assembly and then added the deck. After which I began to wonder.... Would the insides of the splinter shields along with whatever deck equipment installed have been painted the same as the outside of would they have retained the neutral gray color? 11/14/2013
Second glitch, again a minor one ... The instuctions for the crane refer to parts B34 and 35, but in acuality are A-34 and A-5 | ||||||||||||||||||||||||||||||||||||||||||||||||||||||||||||
 |
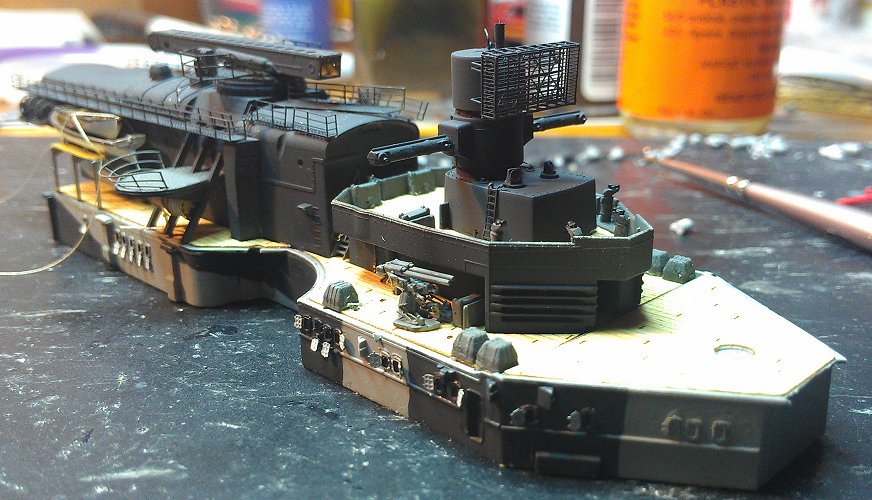
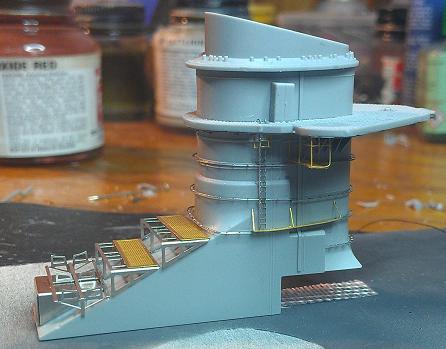
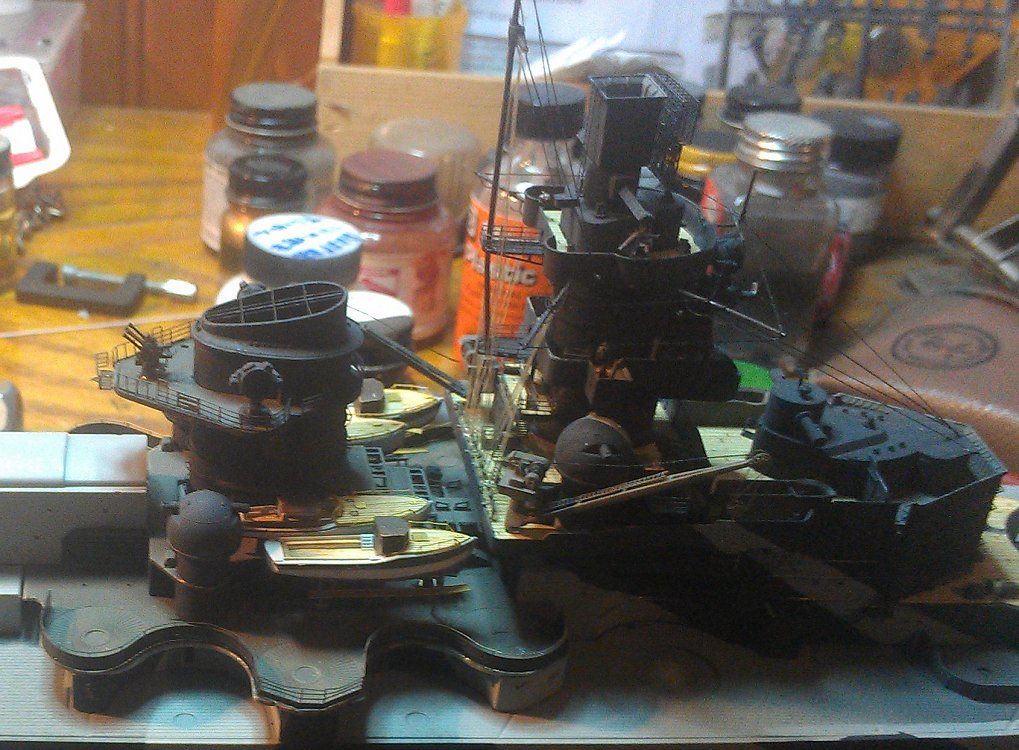
11/25/2013. I've been building and painting the sub assemblies for the conning tower and most of the larger sub asseblies of the forward superstructure and conning tower have been assembled, masked off and painted. Now it's time to add small details such as railings, platforms and ladders. These are being hand painted since it would be impossible to mask off the ship with them attached
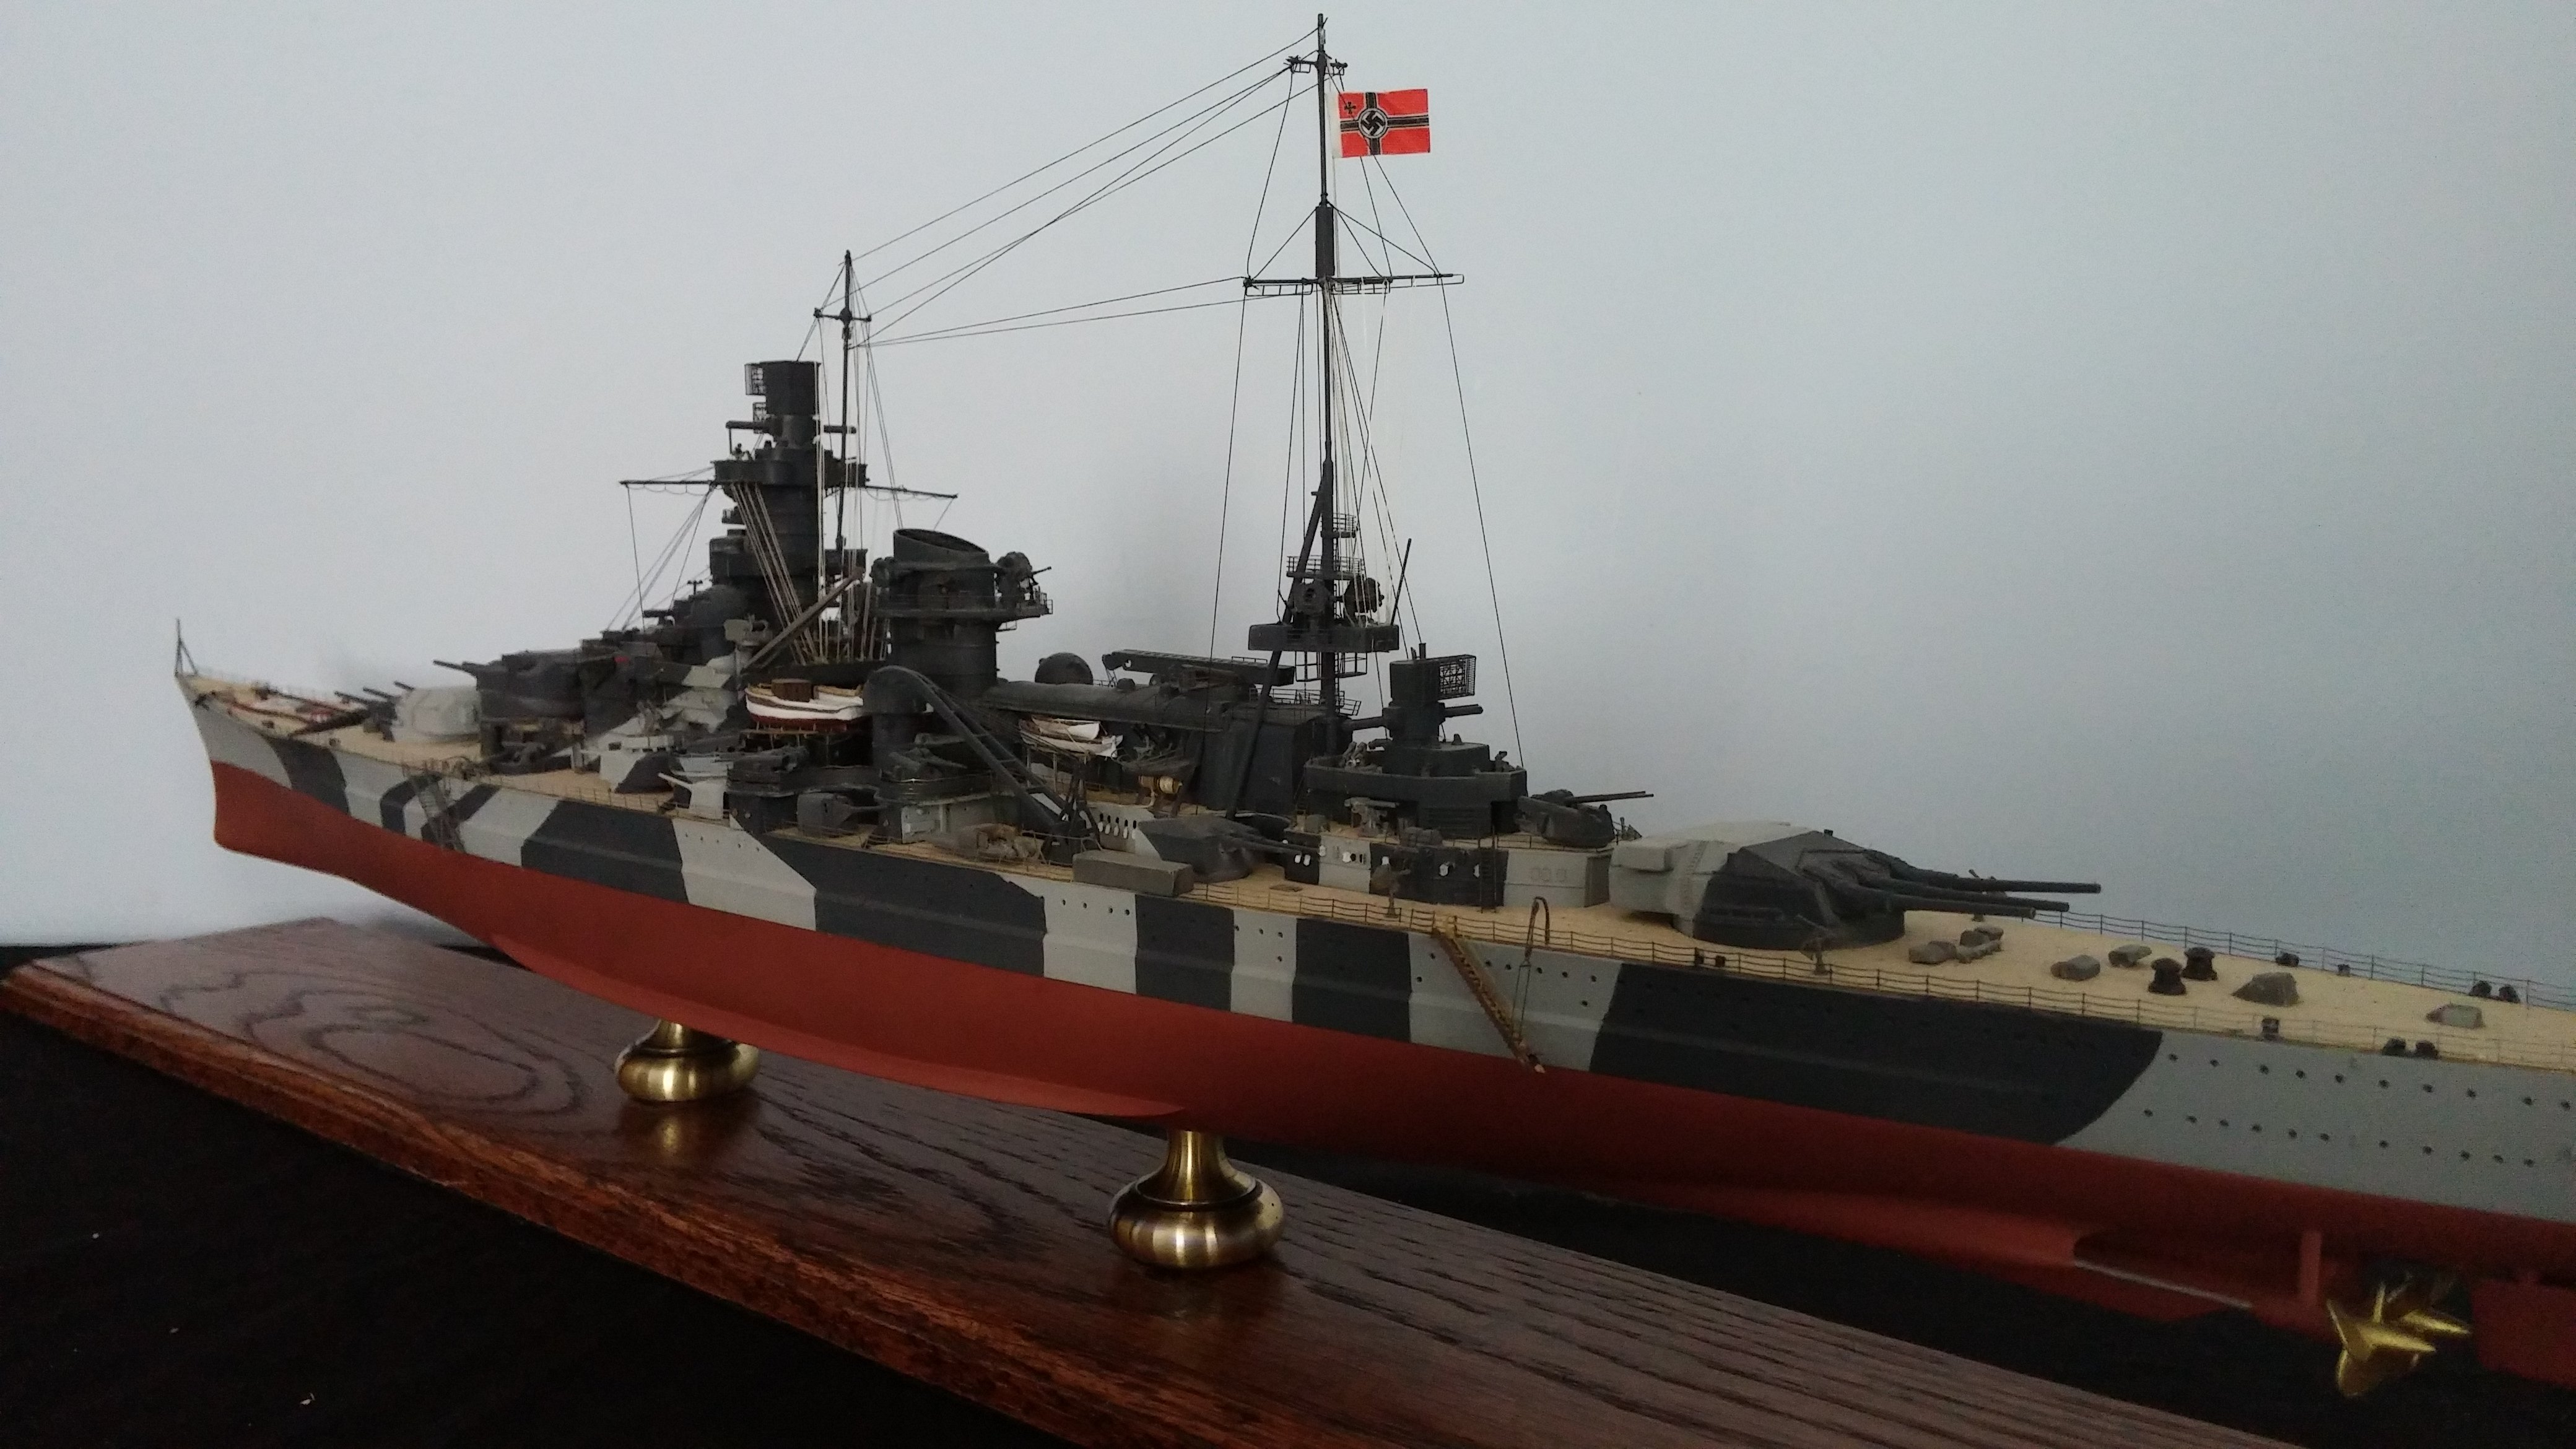
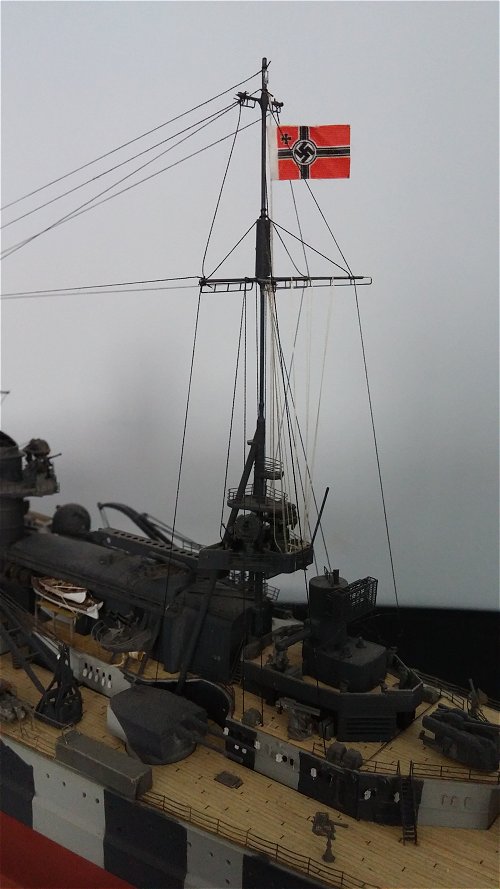
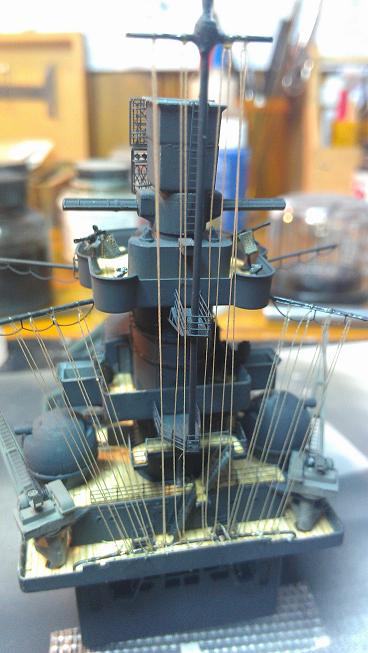
12/01/2013 I've finished the forward Conning tower so now I'm going to rig the flag halyards and antenna cables This is Substantially easier to do at this stage. There's a fife rail between the the ship's cranes on the original ship for tieing off the halyards, it's not in the kit so I added a bar made fron .015 brass rod to tie on to. once I have the rigging completed I'll cover and dress it up with some strip styrene
12/05/2013 Again I'm kicking myself for not planning ahead and drilling holes where the antenna cables enter the superstructure. I've had to drill into the side of the upper deck of the forward superstructure to install the forestay braces and will need to replace or re-inforce the ones on the front of the conning tower. They're a little out of scale but the dark color of the ship helps to make the a little more subtle | |||||||||||||||||||||||||||||||||||||||||||||||||||||||||||
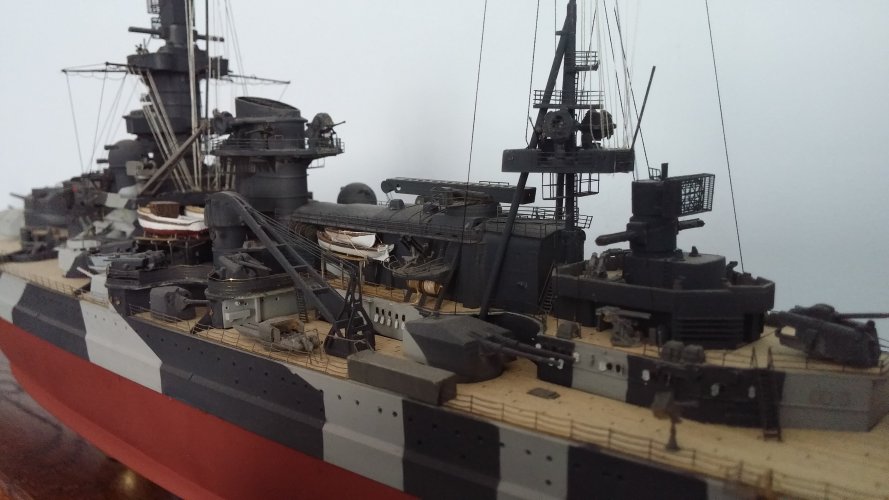
Center Superstructure
| ||||||||||||||||||||||||||||||||||||||||||||||||||||||||||||
 |
12/10/2013
|
|||||||||||||||||||||||||||||||||||||||||||||||||||||||||||
| 12/11/2013
Drilled out the portholes on the cabin walls and added them to the spar deck. Painted the deck gray overall and let dry. Painted the light gray then masked off the camo pattern. Added the porthole hatches to the areas not masked off and airbrushed the dark gray. 12/27/2013
Railings on the AA Deck... What a nightmare. I had great difficulty getting them to adhere to the deck. I assume it's due to the diamond plate details on the deck. Definately recommend prebending these before adding anything to the deck. Finally succeeded but will need to retouch the paint where all the excess CA I couldn't remove. Next comes the ship's boats... Lots of small parts here. Wood decks are a geat touch. |
||||||||||||||||||||||||||||||||||||||||||||||||||||||||||||
 | ||||||||||||||||||||||||||||||||||||||||||||||||||||||||||||
Center Superstructure
|
||||||||||||||||||||||||||||||||||||||||||||||||||||||||||||
Conclusion and final ramblings
And a special thanks and shout out to Andrew and Coach at the Spare Time Shop, Marlboro Massachusetts,
now preparing in Slip way #1, The Imperial Japanese Navy Battleship Kongo Products used in the construction KA Models
Master Models
Photoetch sets for doors, hatches and reels from Tom's Modelworks and White Ensign Models Accurate Model Parts
Research materials,
Last Updated March 30, 2015
| ||||||||||||||||||||||||||||||||||||||||||||||||||||||||||||