Building the Trumpeter
U.S.S. Arizona
1/200 scale
 |
|
 |
 |
 |
 |
| The Kit | ||||
| I won't waste my time dumping on trumpeter or discussing their "long history of releasing models that have glaring errors". I'm not a rivet counter nor do I care that a 39" hull is 1.5 mm short.
I'm just not anal enough to worry about it, and I doubt anyone that sees the finished product will be taking out their calipers to measure the deck planks.
The first thing I notice is that this kit is set up for some serious Radio Control. There are a number of mount locations for motors, stuffing boxes are built into the hull and cutouts and mounts for servos in the main deck. there are even mounts for the secondary armament. As tempted as I was to take the gear out of my old Nichimo Yamato, I wouldn't be interested in going that route at this time, though I might find a different use for the cavernous hull.....
First decision is color. This has been a source of constant discussion for years and after looking at the colors both sides believe it to be, I'm going to throw my 2 cents in and disagree with both sides.
First is a color photograph I found (and have since lost) showing two men raising the flag over an empty dark Blue turret barbette The second is my background as a photographer. Learning on large format equipment and high contrast film that would have been typical of the time, Gray is gray is gray.... Haze gray in color is still haze gray in Black and white, same goes for ocean gray.
And Finally, a neighbor I knew back in the 60's-70's who was stationed at Pearl Harbor. When he saw the 426'th Revell Arizona I had built he said to me "nice job kid but the color's wrong. it should be dark blue just like that airplane" (an F-4U corsair). I wanted to go for the darker blue, but I've decided on Model Master 5-N Navy Blue which seems a little light to me. This is the ongoing saga of my representation of this ship, a ship that never fired its Main Guns in anger and died in a tragic blaze of glory
| ||||
| The Build
Keel Laid, August 15, 2015 | ||||
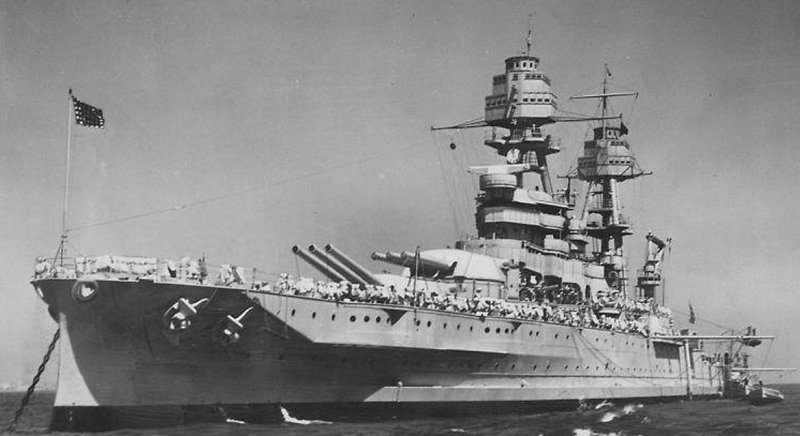
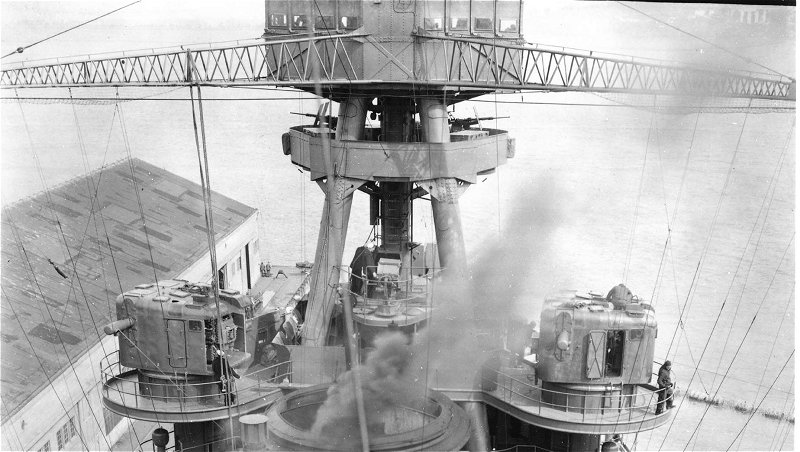
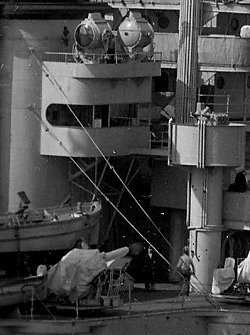
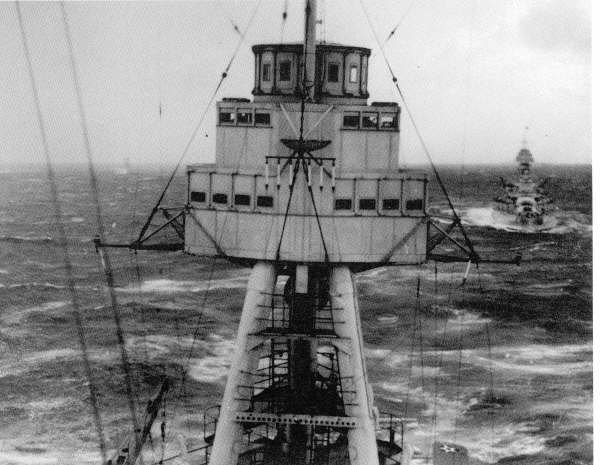
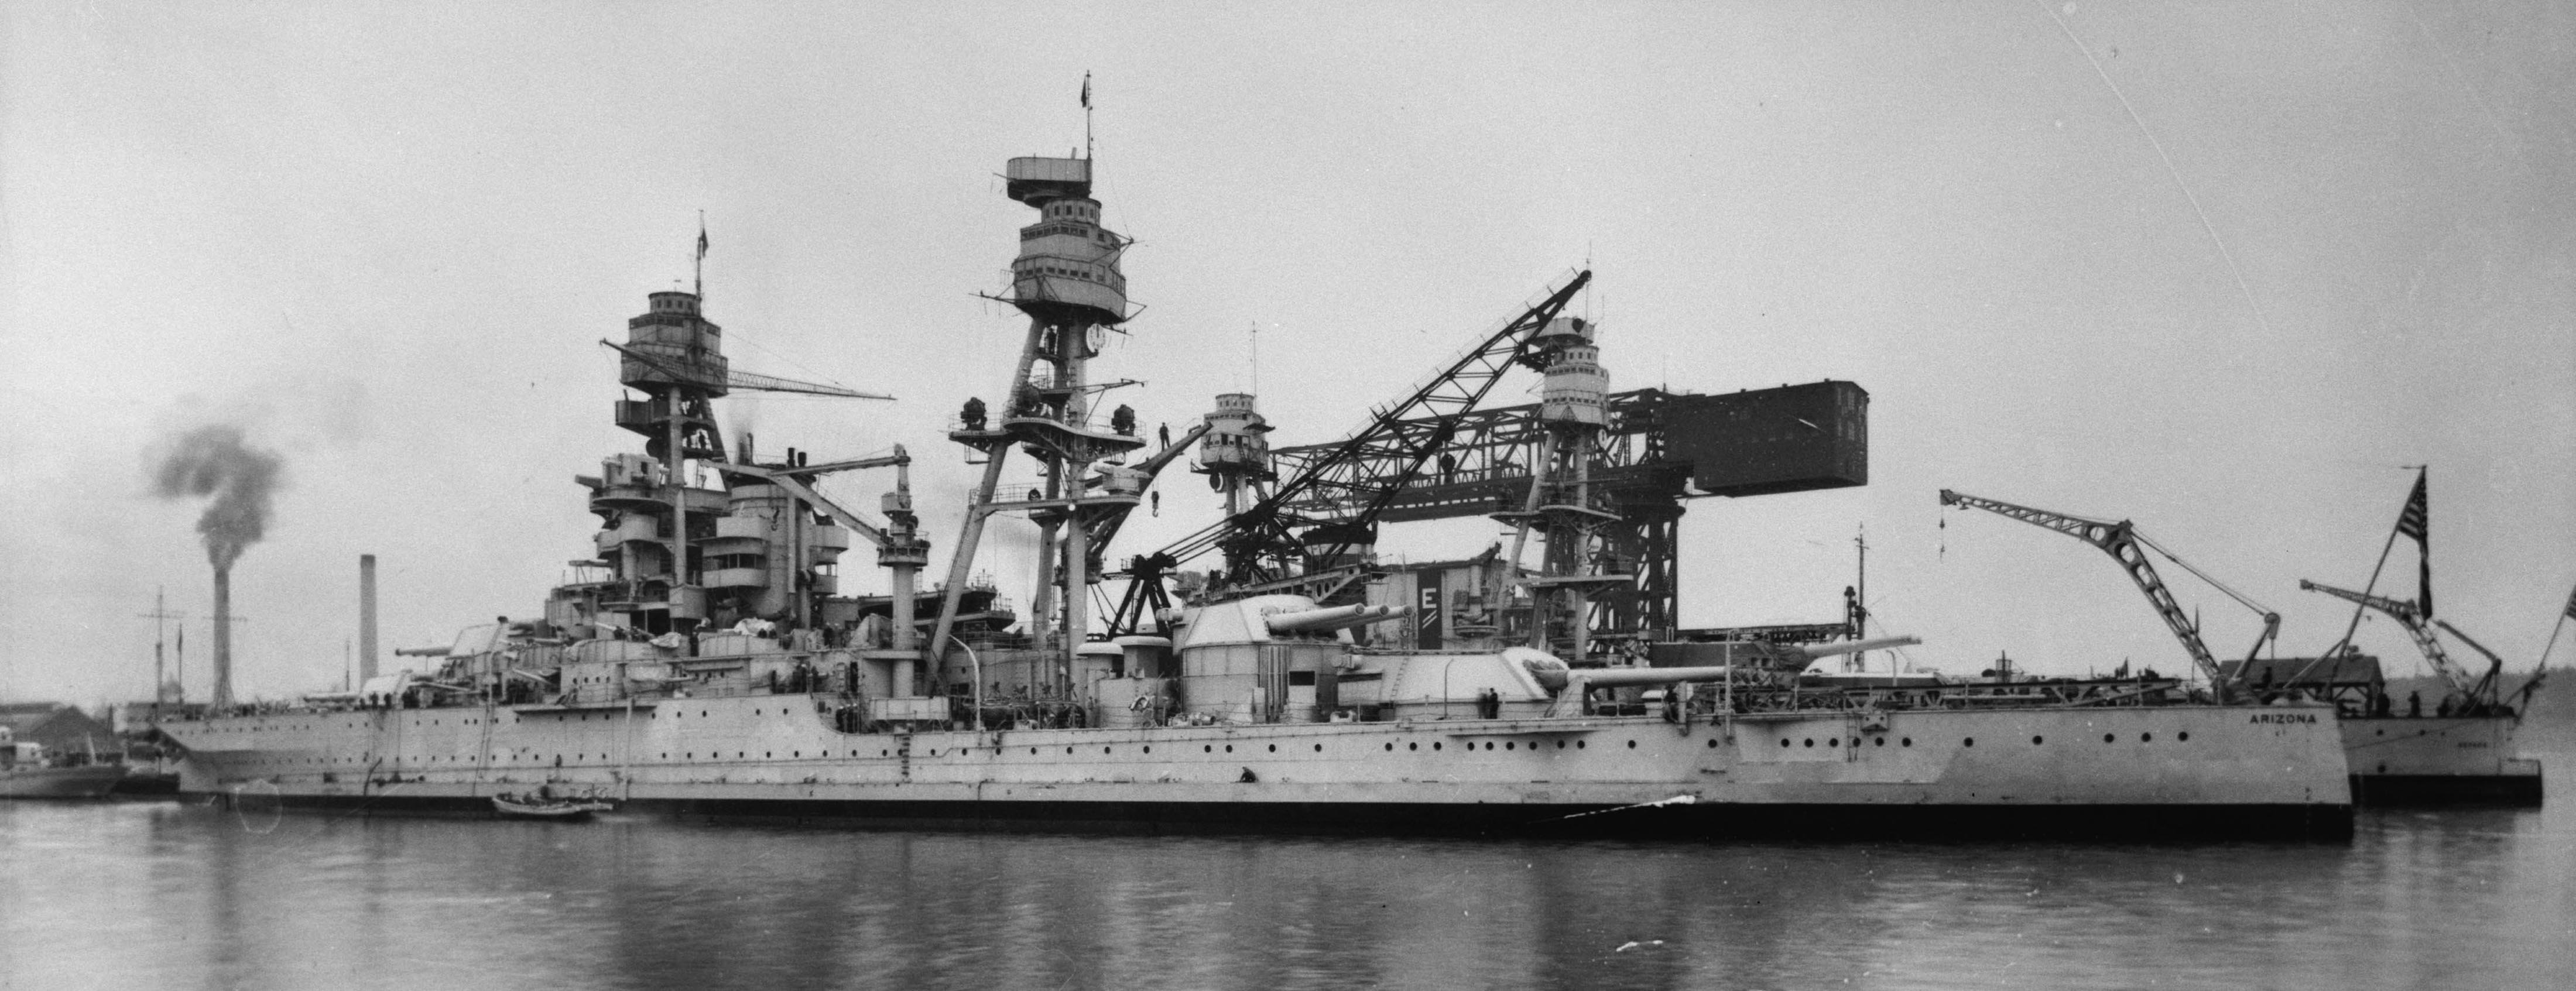 I'm using the above photo to base my build on. It was taken in Puget Sound Navy Yard, 18 January 1941 after the "Bird Bath" and new forward yard arms were installed and contains many subtle details omitted from the kit. Although I'm not a rivet counter I do love to add details I might find missing from the kit, and the above photo might be one of the last photo's of the ship intact. | ||||
| Hull | ||||
| Lower Hull
As usual, I start by preparing the hull for mounting. Due to the size of this ship I'm using four pedestals instead of the usual two.
| ||||
| Upper Hull
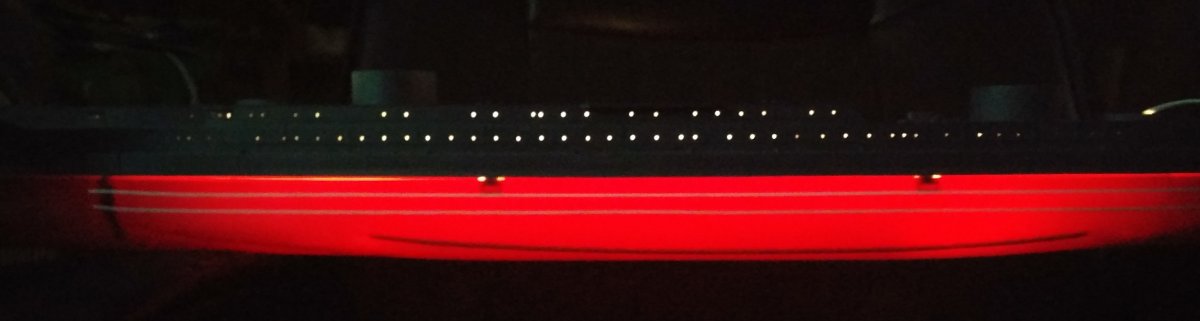
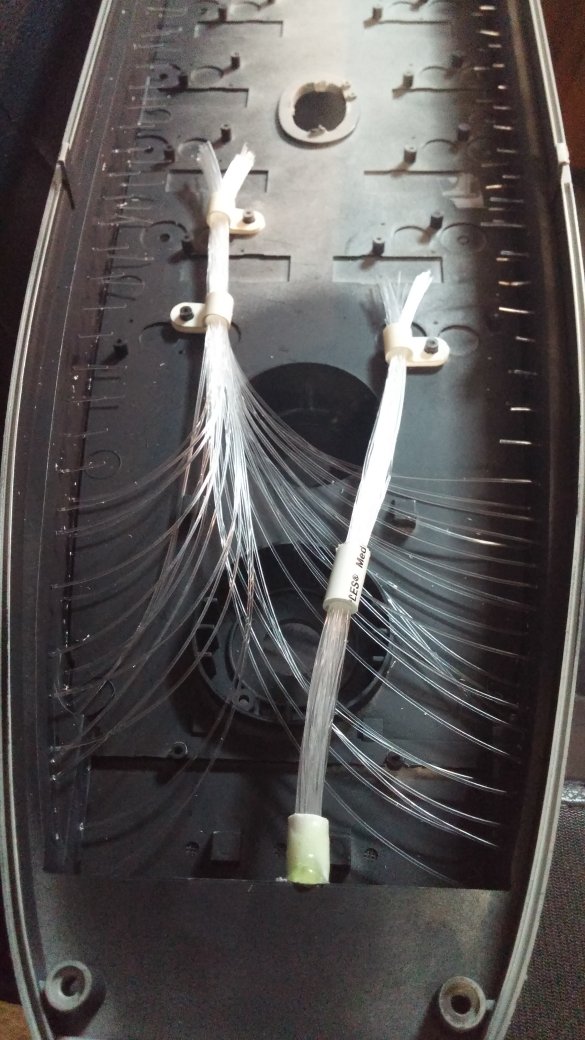
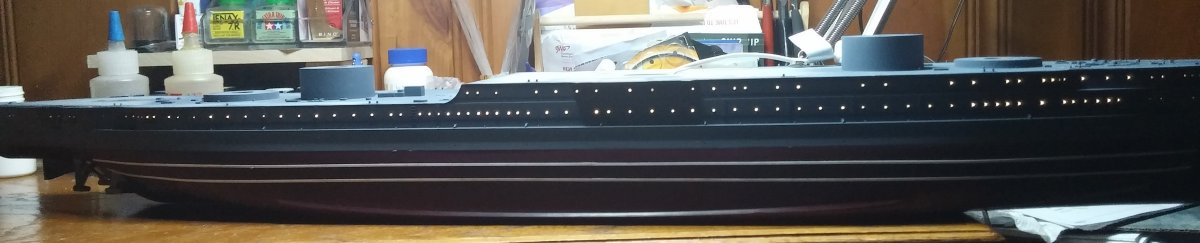
I drilled out the portholes on the hull. 232 (but who's counting) drilled out to .025. Once the hull is painted, I will fill these with .5mm fiberoptic lines with the ends flared to fill in and represent glass in the portholes. Whether I actually light the hull I'm still on the fence. My concern is heat from and the intensity of the light source. Another issue is the the way the two haves meet. with the deck molded into the upper hull. installation needs to happen after I paint but before I join the upper and lower halves. I've painted the upper hull in preparation for the fiberoptics. I need to paint the inside of the hull Black to keep the hull from glowing when the light source is on. (shoulda thought of that before I painted the outer hull, so break out the masking tape). Next I need to put a couple throughhulls in the bow and stern bulkheads to pass the fiberoptics through | ||||
| Fiberoptics
The cable has arrived and I've begun installation
| ||||
| Armament | ||||
| 14"/45 Caliber Main Guns
| ||||
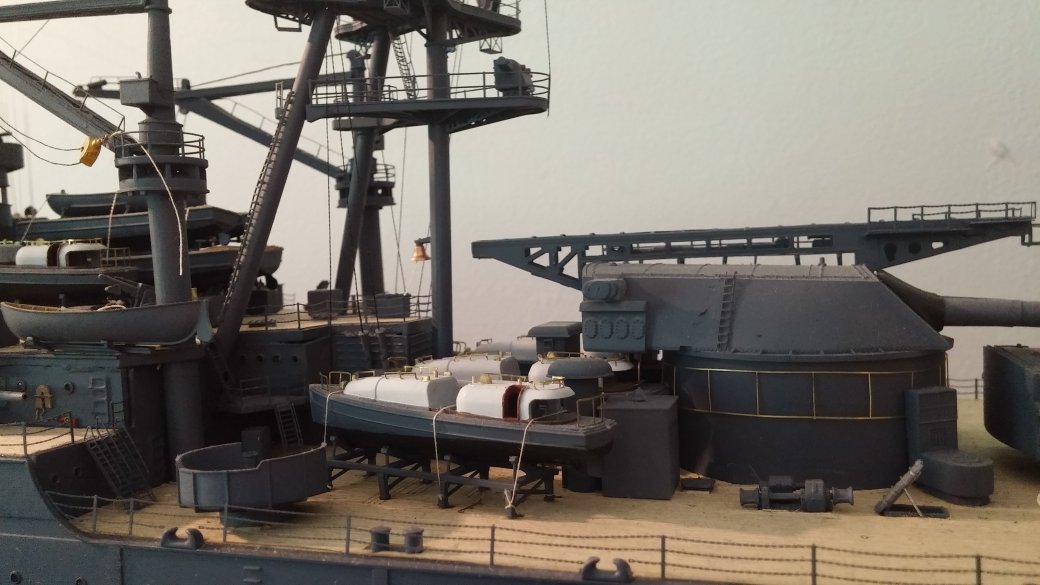
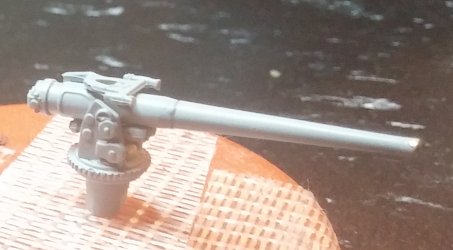
| 5"/51 caliber guns, Sponson mount
Nice detail on the moldings, including the breech blocks. These are just begging to be detailed although they won't be seen, I might add hand wheels and handles and various other details if I get ambitious
| ||||
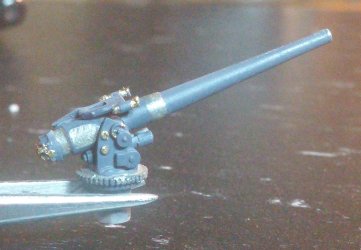
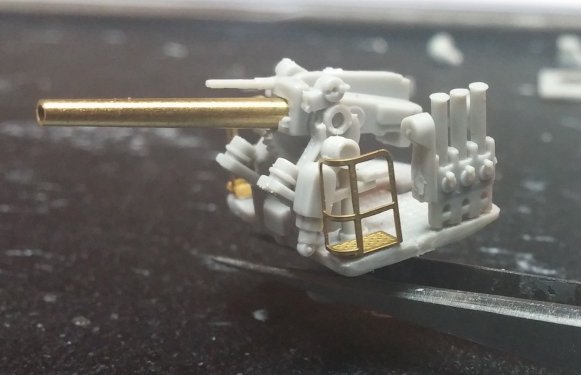
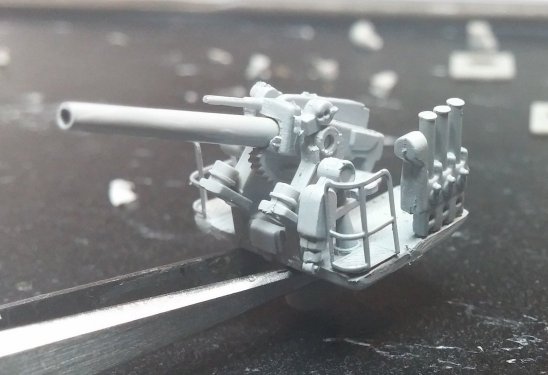
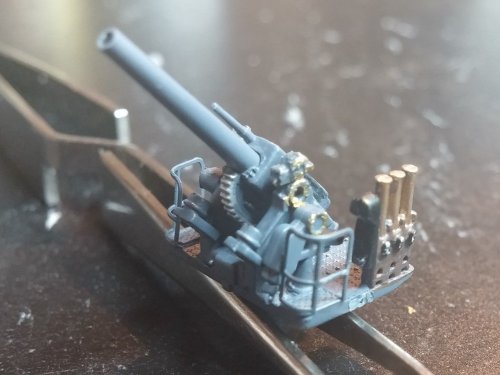
| 5"/51 caliber guns, Weather Deck Mount mount
This is one of the placed the KA set falls short. Some handwheels, other details for these guns would have been nice, maybe seats and foot pedals. Like the Sponson Mounts, a coat of Alclad primer, 5-N blue and some bare metal details. Looks like I missed a sprue cut on this one
| ||||
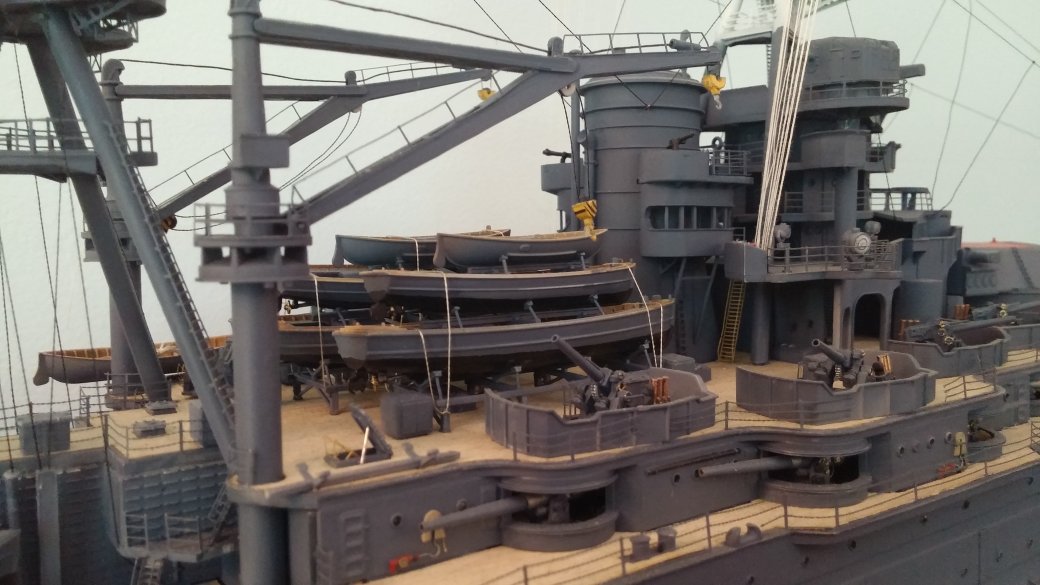
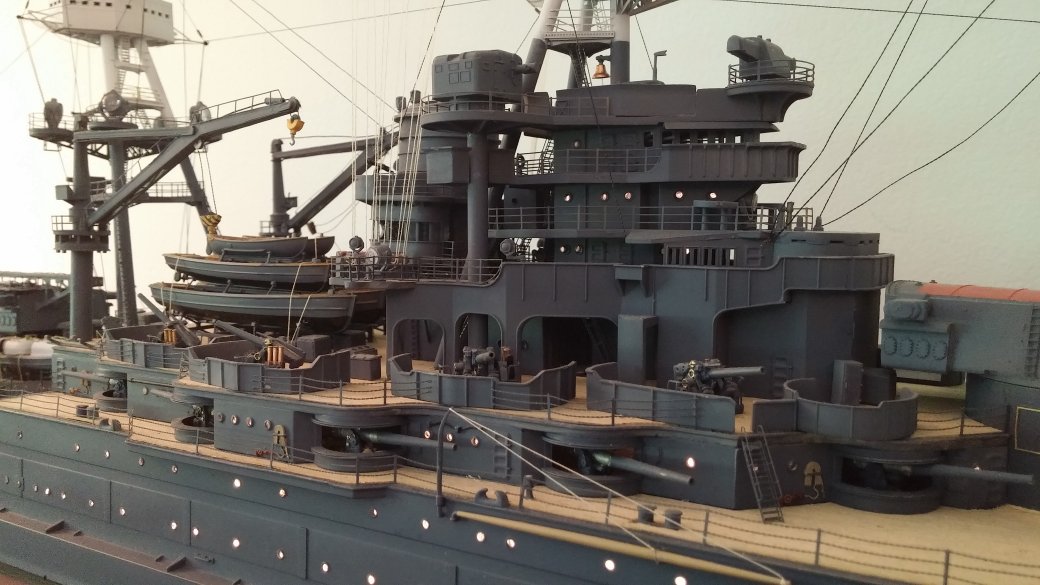
| Cranes & Catapults | ||||
| Deck Catapult
Pretty straight forward, not alot of modifications needed | ||||
| ||||
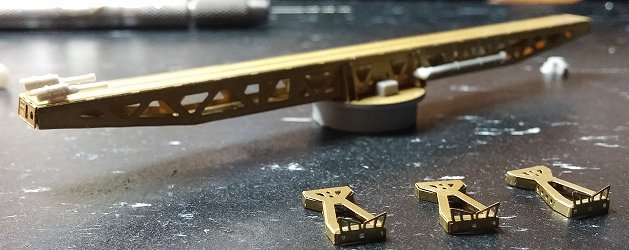
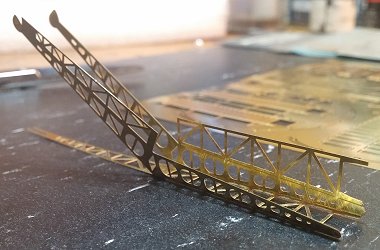
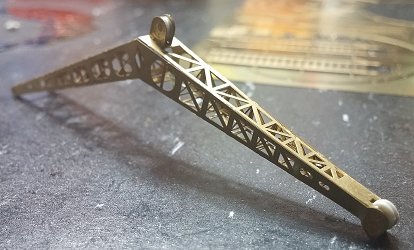
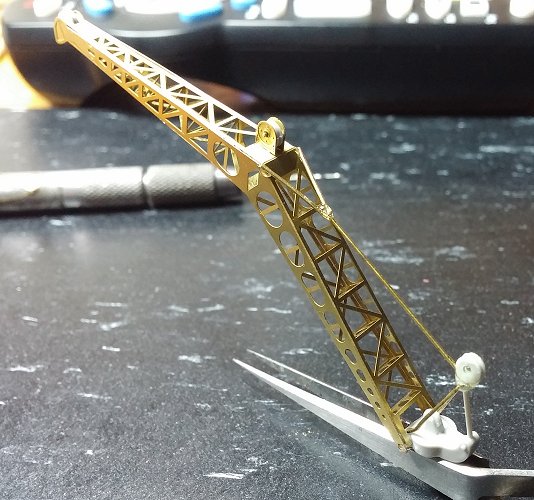
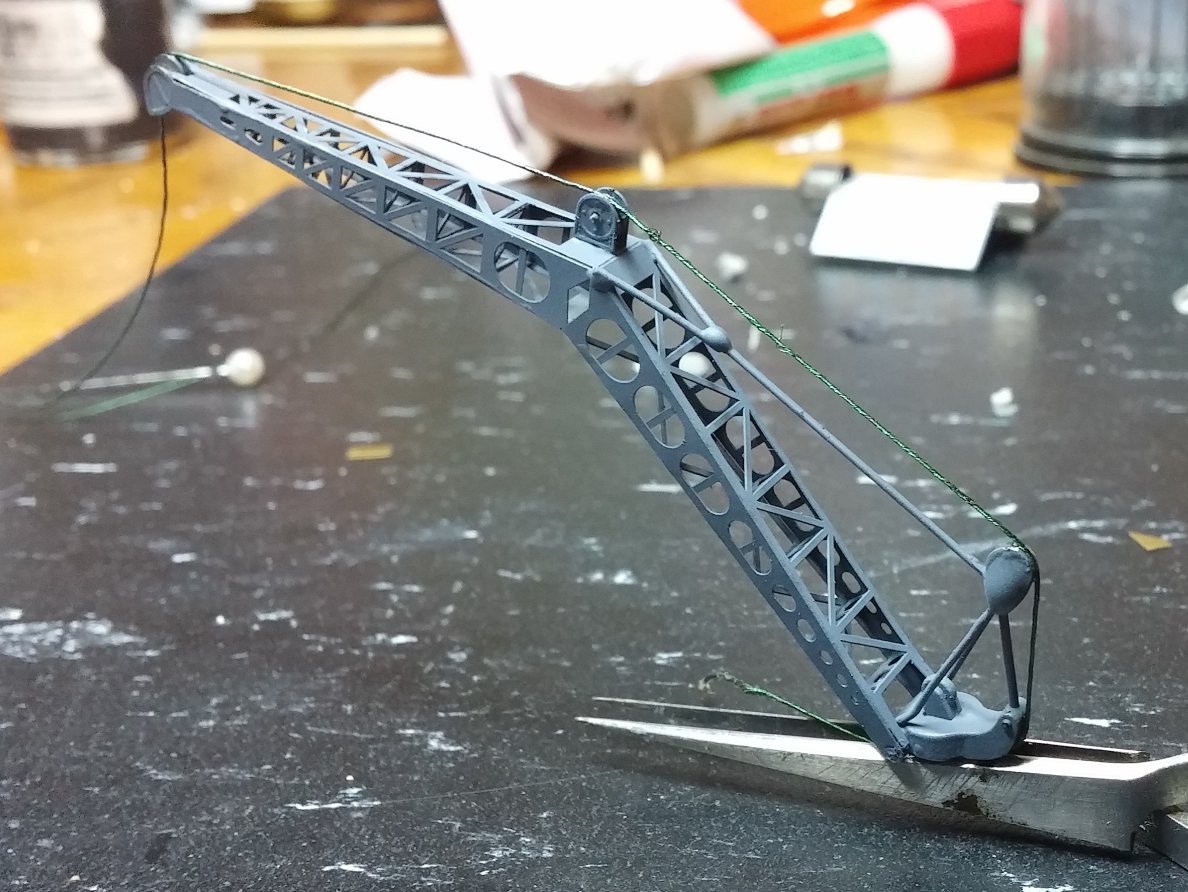
| Stern Crane
| ||||
| ||||
|
A little more difficult, the PE set included all the interior braces, but not exterior braces.
 | ||||
Midship Cranes
 | ||||
Stack
| ||||
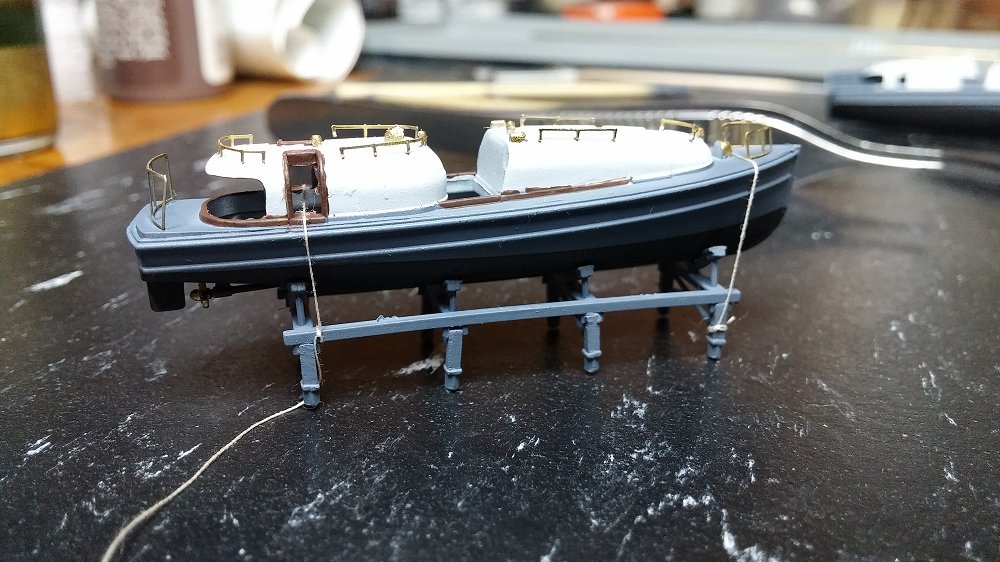
| Ship's Boats | ||||
| Unfortunately, the KA set did not come with planking for the ships boats. I think I can strip some from inside the cabin
| ||||
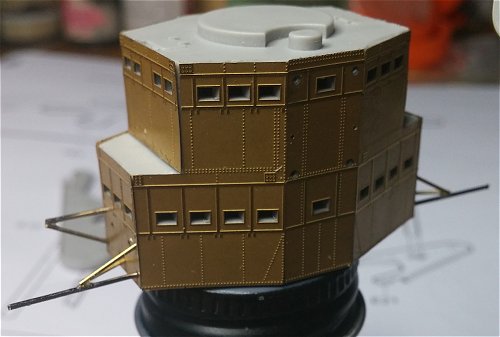
| Superstructure
| ||||
| Coming eventually | ||||
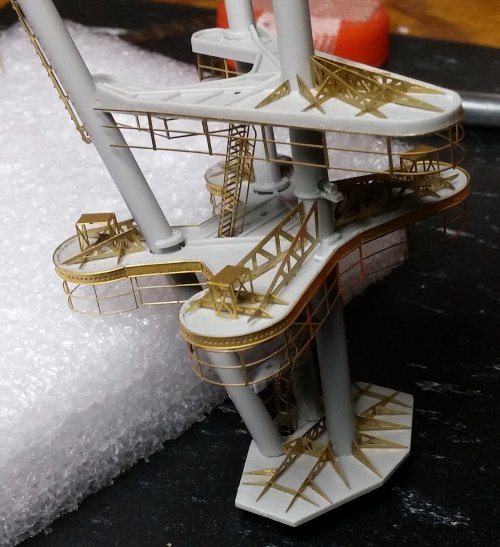
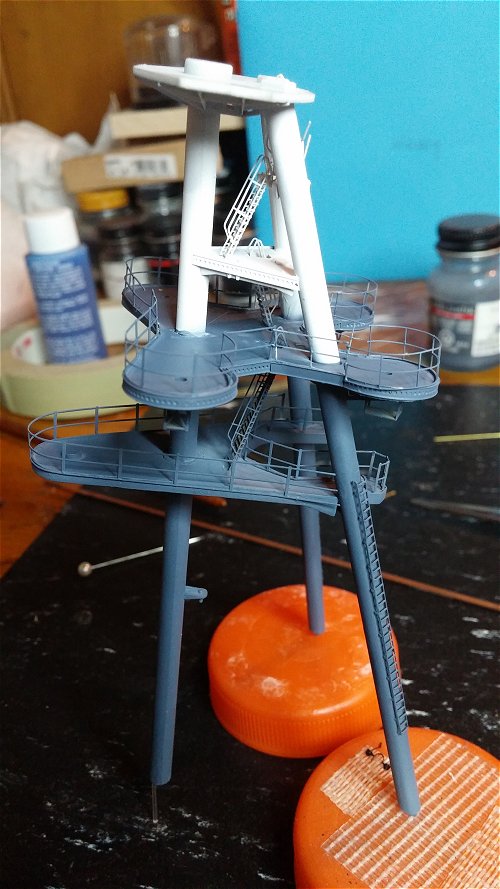
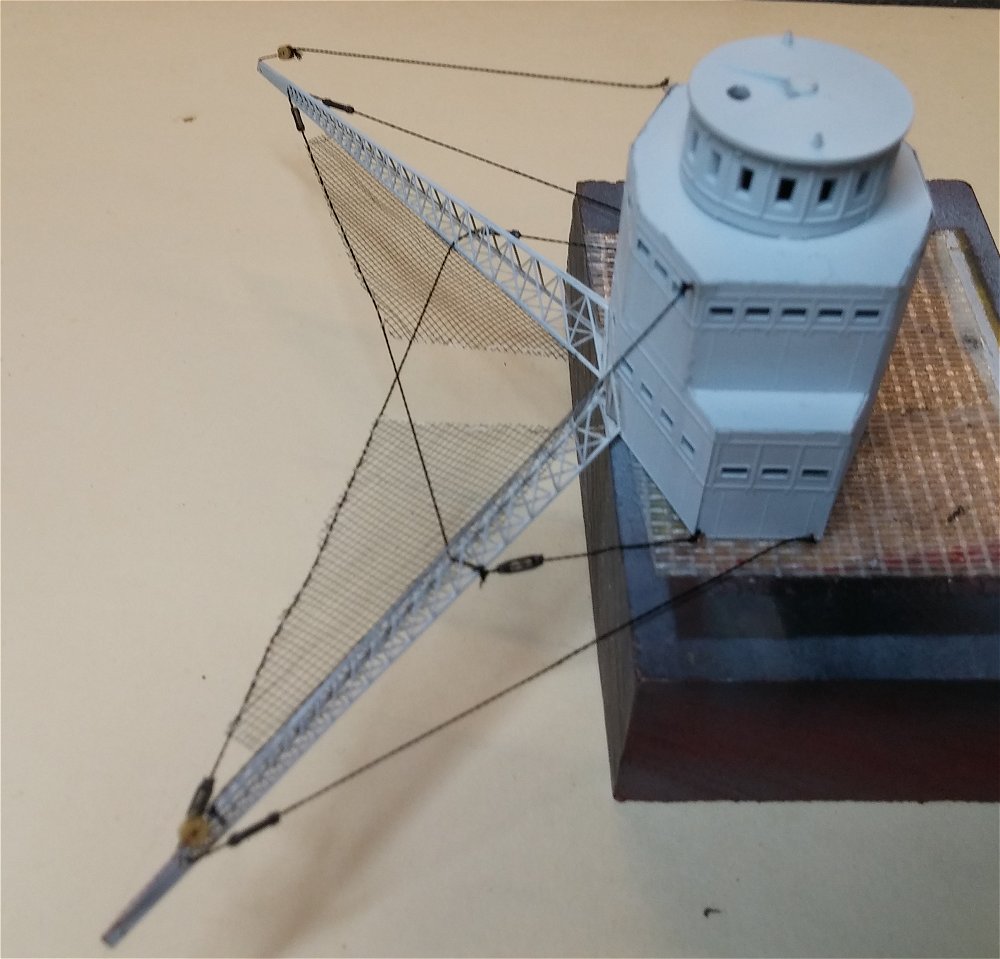
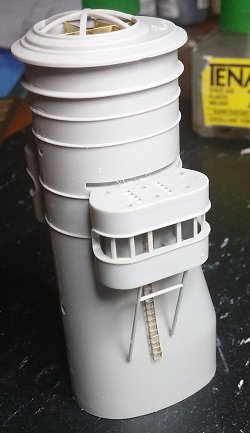
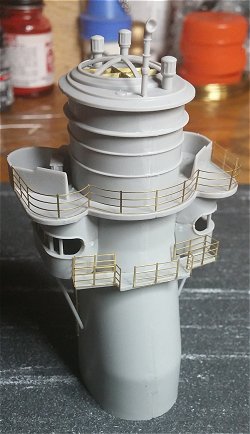
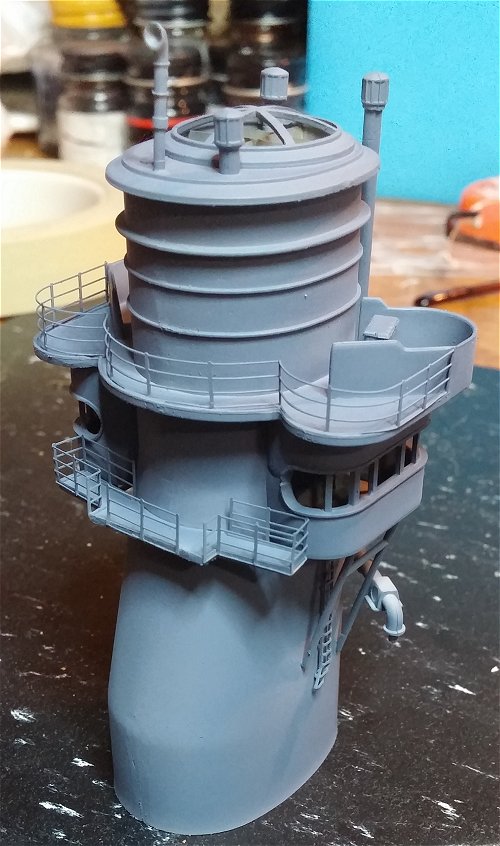
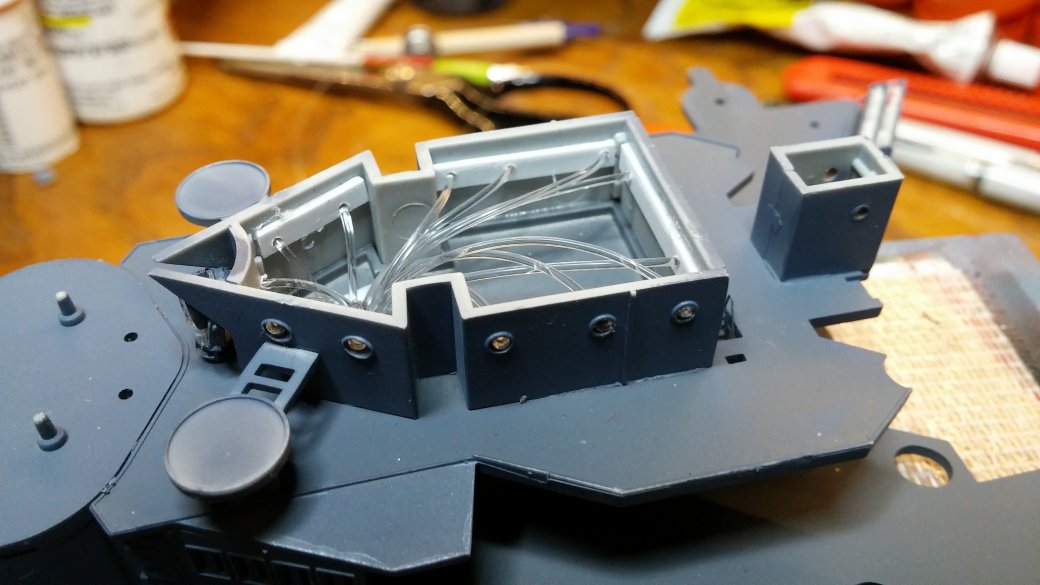
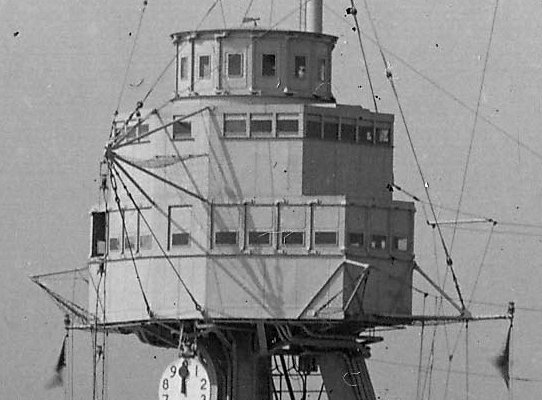
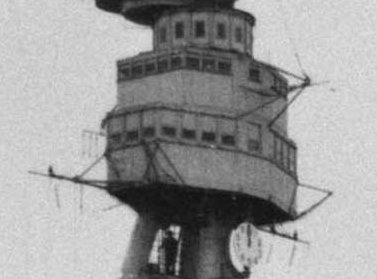
| Mainmast | ||||
|
Lots to do here.
| ||||
| ||||
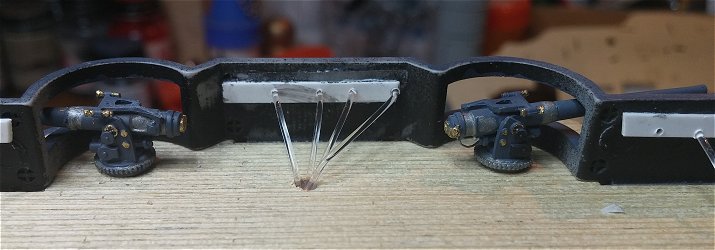
| I had planned on using Mosquito netting to simulate the safety nets under the braces, but the Mesh was too large so I went to an old stand by I use for blast bags, my wife's old nylons. Mesh seens to be right, but difficult to work with due to the elasticity. For the bracing I used #11 glass beads to simulate the insulators and Grandt Line Turnbuckles in HO Scale. Both look to be about the right size for the scale | ||||
| Foremast | ||||
| ||||
(this is actually the U.S.S. Pennsylvania)
Coming eventually | ||||
Products used in the construction
KA Models MD2001 DX Pack
Photo etch and Wooden Decks
Thank you to the owner of KA who came to my rescue when when the uper deck was absent from the PE Set
Really good kit, but boat racks, maybe some details for the 5"/51 deck guns and some wood for the launches would would have been nice
Grandt Line Turnbuckles
Syren Ship model 2mm blocks
Fiber optiics from The fiberoptics store
Research material..
The Battleship Arizona, Kagero
And of course... The Internet
navSource. Always a good place to start.
There aren't many Hi-resolution detailed photos of Arizona available, but I was able to fill in some of the blanks using her sister ship, U.S.S. Pennsylvania.
And Finally... Thanks to Andrew and Coach at the Spare Time Shop in Marlboro MA for getting me this kit
feel free to comment
Last Updated September 1, 2017